Your Guide to Sublimation on Cotton with FOREVER Subli-Light
Raise your hand if you’re ready to start sublimating on cotton!
In the world of garment decoration, one of the most frequently asked questions is “Can I sublimate on cotton?” And up until very recently, the answer was a resounding “no.” But that was yesterday. Today, there are a number of transfer papers and heat transfer vinyl by FOREVER, Siser and other brands that will allow you to personalize cotton garments and other fabrics using your sublimation printer! Today, we will be showing you how to use the FOREVER Subli-Light (No-Cut) transfer paper to add your beautiful designs to cotton tees.
FOREVER Subli-Light vs. Siser EasySubli
Before we get into how to make awesome custom tees with FOREVER Subli-Light, let’s talk a little bit about the difference between Siser EasySubli and FOREVER Subli-Light. You may have already heard of Siser EasySubli, the heat transfer vinyl that you can sublimate and then press onto your garments. EasySubli has been a massive success, and we have another blog entirely dedicated to it.
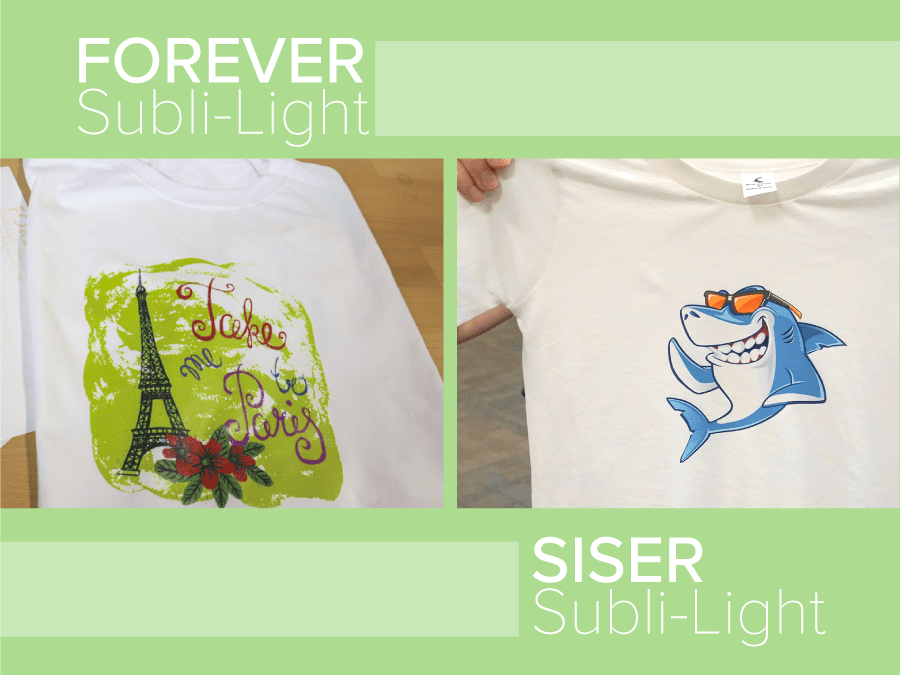
Indeed, both EasySubli and FOREVER Subli-Light are excellent options for sublimating on cotton, but there are a few notable differences. First, EasySubli is a fairly thick heat transfer vinyl at 220 Microns (for reference, Siser EasyWeed is only 90 Microns thick). This will give your garment a distinct hand or feel to it. In contrast, while FOREVER Subli-Light also gives off a hand, it is very light in comparison and much closer to true sublimation (no hand). It’s also essential to cut or trim your Siser EasySubli after printing, which requires a cutting plotter for the best results. FOREVER Subli-Light does not require any cutting or trimming as it produces no background, saving you time and money.
On the other hand, FOREVER Subli-Light only works well with vector images and bright, bold colors (150% CMYK color value or higher). This may be somewhat limiting in what you want to print whereas EasySubli works great for full-color photos in addition to vector-based art. Additionally, FOREVER Subli-Light is designed exclusively for light-colored fabrics whereas Siser EasySubli can be applied to garments of any color (dark and light).
Both Subli-Light and EasySubli are fantastic solutions for printing on cotton, and which solution you go with ultimately depends on your needs, the designs you will be printing, and the color of garments you plan to print on.
Let’s Get Started!
Now that you understand the differences between Siser EasySubli and FOREVER Subli-Light, let’s get into creating your own custom cotton T-shirt with the Subli-Light transfer paper.
You Will Need:
- FOREVER Subli-Light Transfer Paper
- Silicone-Treated Cover Sheet
- White/Light-Colored Cotton T-Shirt
- Heat Press
- Sublimation Printer
- Graphics Program (Photoshop, Illustrator, CorelDRAW, CreativeStudio, Etc.)
Step 1: Create Your Design
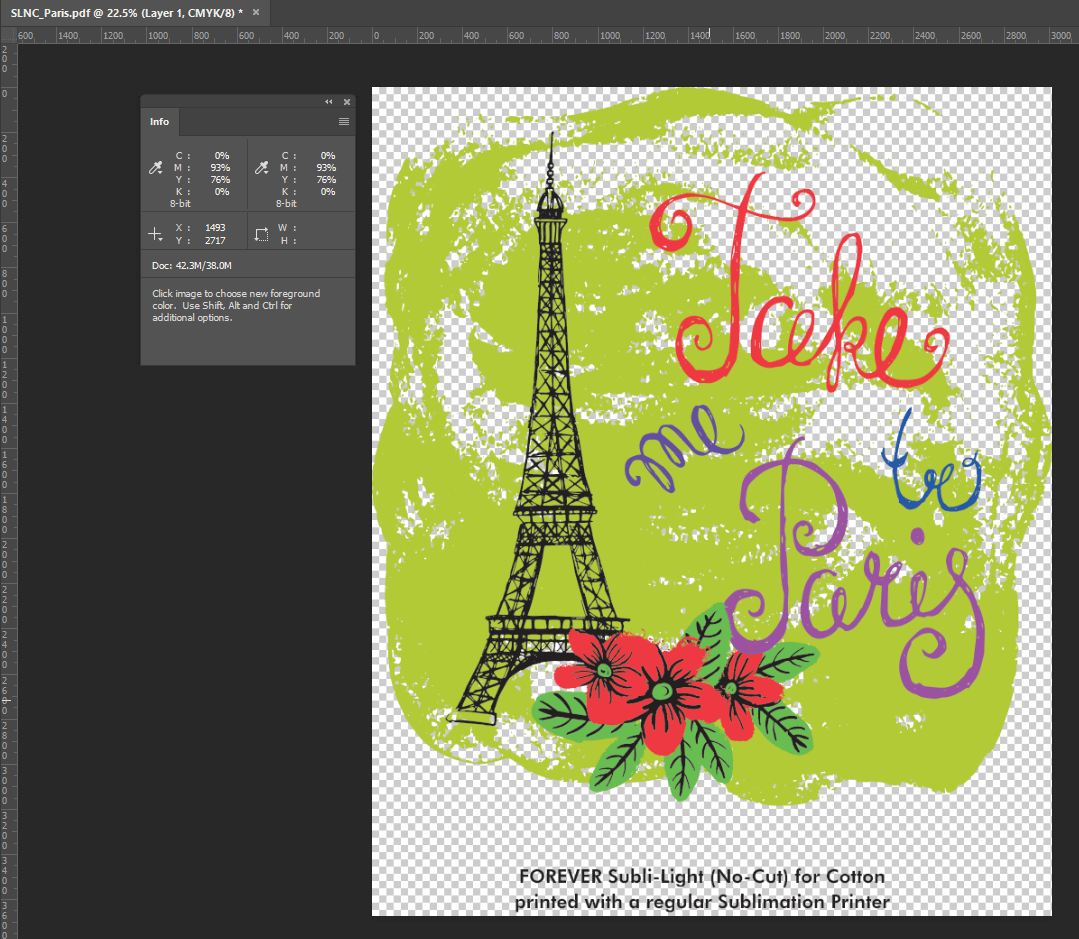
With FOREVER Subli-Light, you will get the best results when working with vector-based art with bold colors. To get started, you will need to either create your own artwork, or you can find tons of PNG and SVG designs on the internet for free or a small fee. At Coastal, we love using freepik.com, but you can also find loads of designs on Pinterest, Etsy, and by running a Google search for “free vector graphics.”
When you have your design, one thing to make sure is that your colors have a 150% CMYK. One easy way to do this in Adobe Photoshop is going to your top navigation and selecting “Window” and then “Info.” Then, select your Eye Dropper tool and hover over each color. Simply add up the percentages of the CMYK values, and if it’s over 150% for each color, you’re golden! If you’re under 150%, we would recommend selecting a different color. In Adobe Illustrator, you can find this same information by going to “Window” and then “Color.”
Step 2: Print Your Design
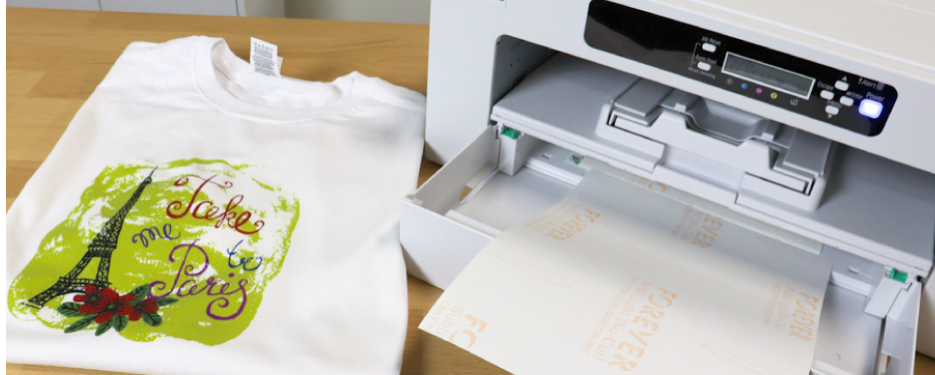
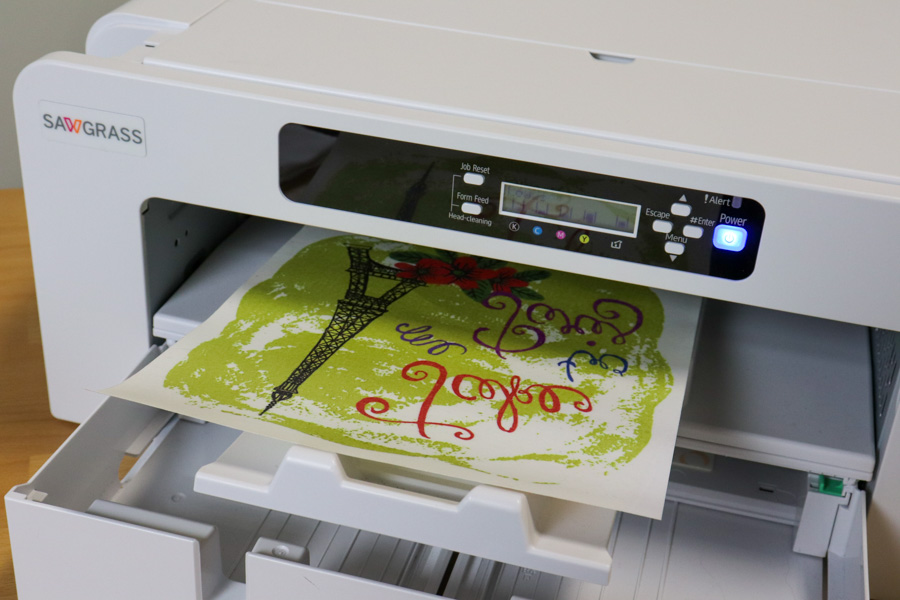
Once your design is set, send it to your sublimation printer! First, load your FOREVER Subli-Light into your printer. In Sawgrass printers, the blank side will be face-down in the paper tray.
If you are printing with Sawgrass’ Print Manager (SPM), you will want to enable the FOREVER edition of Virtuoso Print Manager (available in versions .1717 and higher). To do this, right-click on your VPM icon, select options, then edition and then type in “forever” in the prompt. After that, launch Virtuoso Print Manager with the “Forever” edition selected. Your substrate will be set to cotton, and then set your paper to Subli-Light (No-Cut).
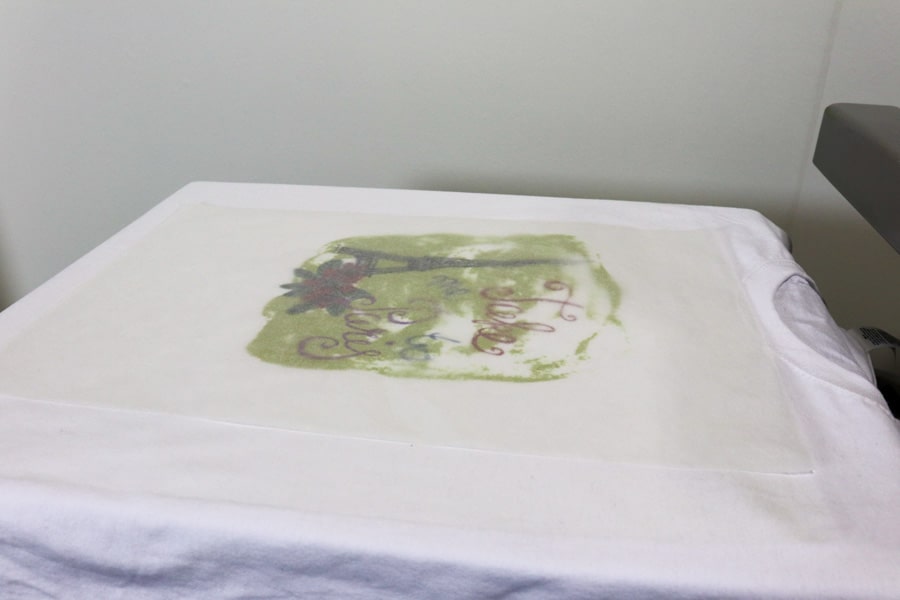
You will want to make sure that your design is mirrored, and this is set by default in Virtuoso Print Manager. Once you’ve printed your image, get ready to press!
Note: your design will come out wet - that’s normal! Do not let your print dry, or it will not turn out right.
Step 3: Get Pressin’!
Before you press your transfer, pre-press your T-shirt or garment for 15-30 seconds. Once pre-pressed, align your transfer paper, cover with a silicone-treated sheet or parchment paper. Then, press your printed transfer onto your garment for 30 seconds at 356°F at a medium pressure. Once pressed, peel your transfer immediately, grabbing one corner and peeling toward the opposite corner.
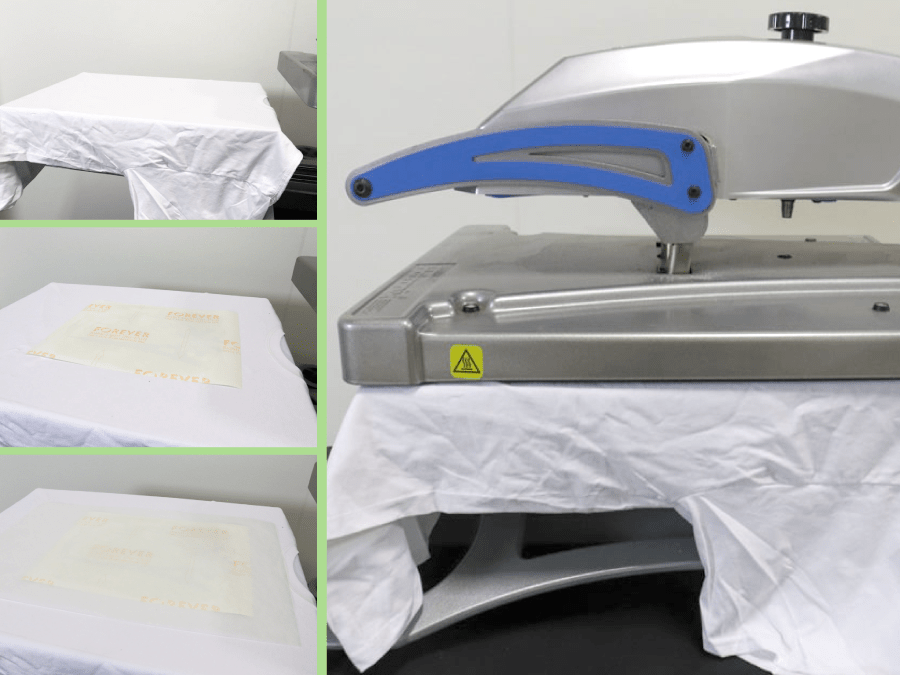
Step 4: Re-Press for 30 Seconds
Press again with a matte or glossy finishing paper for 30 seconds with high pressure. This step is important not to miss as it greatly improves your transfer’s durability and washability.
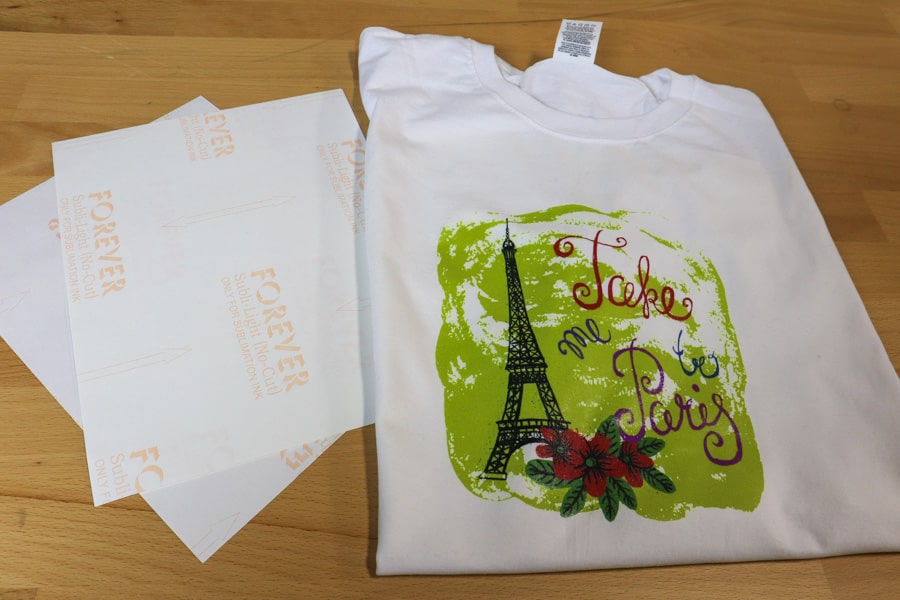
That’s it! You have now successfully created a custom T-shirt or garment using FOREVER Subli-Light (No-Cut).
We hope this guide proved useful! As always, if you have any questions, do not hesitate to reach out to our Custom Success Team by phone at 800-562-7760 or by email at [email protected]. We’d also love to see your creations! Tag us on Instagram with #coastalbusiness for a chance to be featured.


0 Comments
Leave a Comment