How to Sublimate on Cotton & Darks with Siser EasySubli
The word is out! Siser has introduced EasySubli, a new and revolutionary heat transfer vinyl that can be sublimated! EasySubli can be directly printed on with your Sawgrass sublimation system and then applied to not only polyester fabrics but also cotton, rayon, and cotton/poly blends. That's right - gone are the days when you have to turn down a customer who wants their full color design printed on cotton! Additionally, you can now use EasySubli to customize black and dark-colored garments - while traditional sublimation is limited to only white/light-colored fabrics.
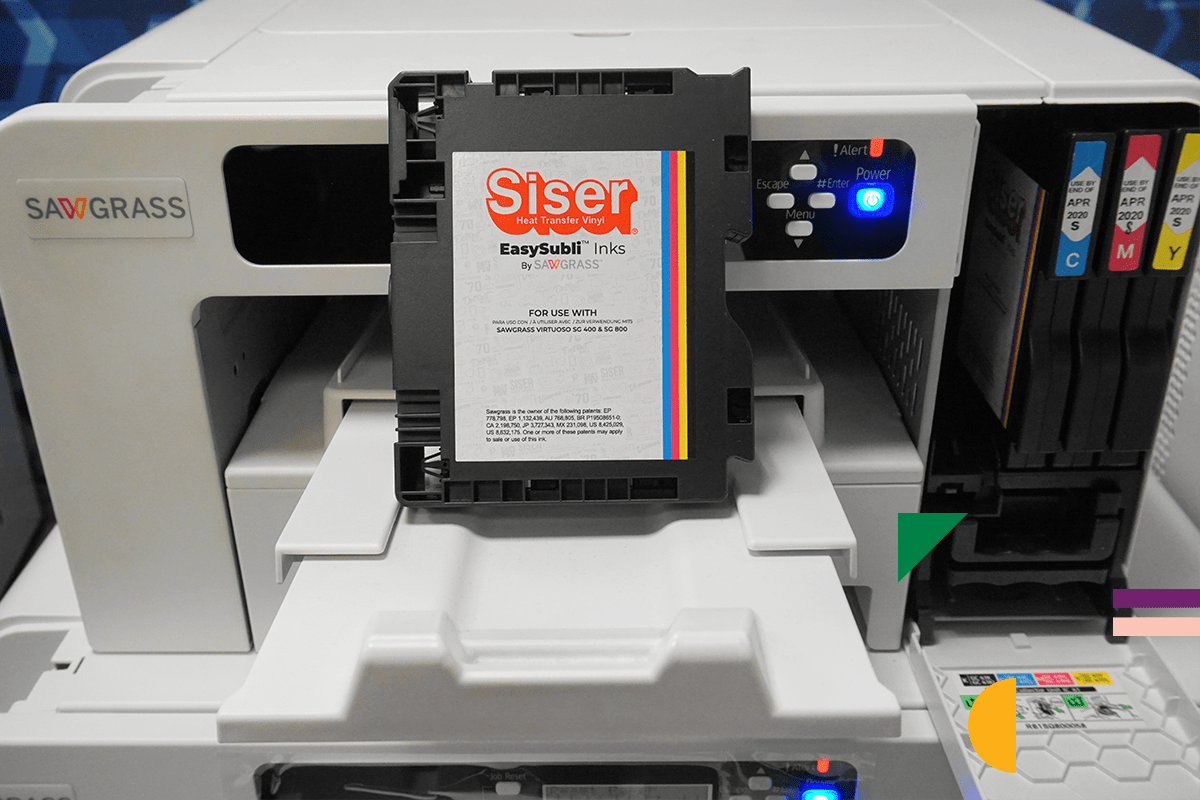
Siser EasySubli is the product of a long collaboration between Siser and Sawgrass, and the new heat transfer vinyl is designed to work exclusively with your Sawgrass SG500 or SG1000 sublimation system. In fact, Sawgrass has developed a new EasySubli Ink that provides amazing results when used with your EasySubli HTV.
But before you race ahead and pick up your pack of Siser EasySubli HTV, know that there are two methods you can follow for printing with EasySubli. We've outlined both methods below, and you will want to decide which you prefer. This will determine what system and ink to use.
Method #1 - Print & Cut with EasySubli Ink
Supplies & Equipment You'll Need
- Sawgrass SG500 / SG1000 Printer with EasySubli Ink
- Heat Press
- Siser EasySubli Heat Transfer Vinyl
- Siser EasySubli Mask
- Squeegee
- Weeding Tool
- PC or Mac with Sawgrass SPM (Sawgrass Print Manager)
The first and recommended method of printing with EasySubli is to use Sawgrass SG400 or SG800 system with Sawgrass' EasySubli ink. This method involves printing directly onto the heat transfer vinyl (as you would with sublimation paper) and then sending it to your vinyl cutter. This process is very similar to solvent printable vinyl like Siser ColorPrint. This method requires that you use Sawgrass EasySubli ink - do not try to print on the vinyl with your regular SubliJet HD ink as it oversaturates the vinyl, and you will end up with a wet mess.
Step 1: Convert to EasySubli Ink or Purchase a New System
To print with EasySubli ink, you will have to either A. Convert your current SG400, SG500 or SG800, SG1000 printer (from your old SubliJet HD/UHD ink. Please note this will void any current warranty) - or B. Purchase a new system dedicated to using EasySubli ink.
Generally, we don't recommend converting your SG400, SG500 or SG800, SG1000 to EasySubli ink for two reasons. First, it will immediately void your Sawgrass warranty. And second, it's really expensive to convert. In fact, it's actually less expensive to buy a new SG500 with EasySubli ink than it is to convert your SG500. That's because converting requires two full sets of ink cartridges to get started. (One set will be used to print 160 full page bleeds to flush out all of the old SubliJet HD/UHD ink).
Step 2: Update Sawgrass Print Manager - Siser Edition
Once you've got your Sawgrass SG400, SG500 or SG800, SG1000 sublimation printer with EasySubli ink installed, you're ready to move to the next step. For the rest of these instructions, we will assume that you already have your Sawgrass printer set up and know the basics of sublimation printing. If not, please see our other blog that covers Sawgrass setup and installation - and don't hesitate to call our Coastal technical support at 800-562-7760.
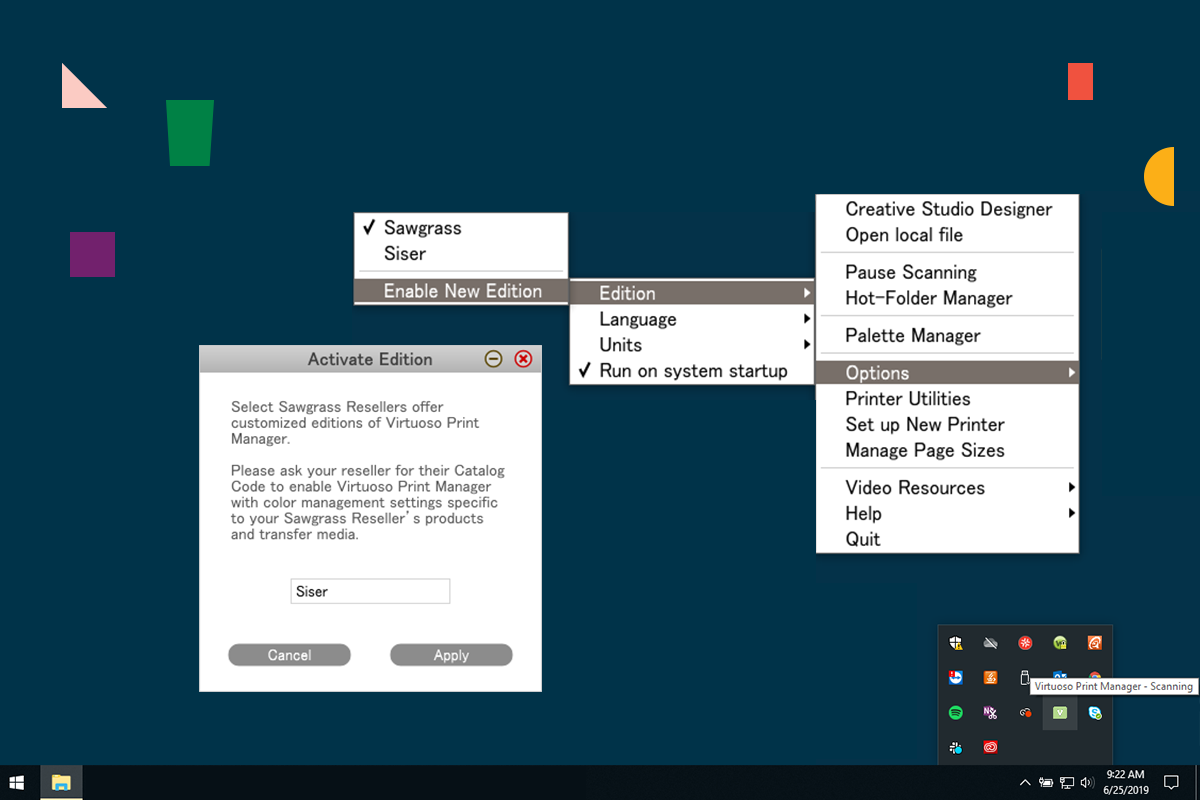
At this point, you will want to activate the new Siser Edition in Sawgrass Print Manager. If you don't have Sawgrass SPM, you'll need to download and install it first. To activate the Siser Edition, start up Virtuoso Print Manager, then right-click on the VPM icon on the bottom right of your desktop (Windows), select Options > Edition > Activate New Edition. When prompted to type in a code, simply type "Siser" and the Siser Edition will now be activated.
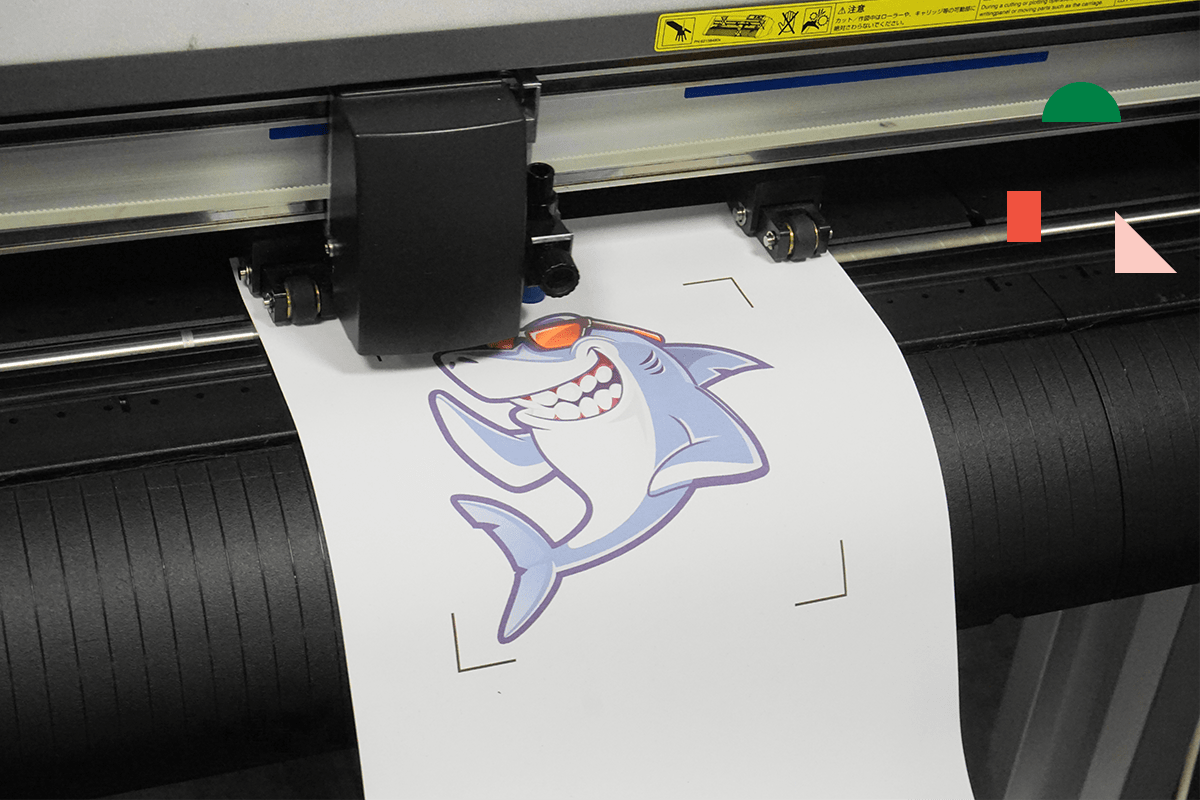
Step 3: Load EasySubli Vinyl and Print
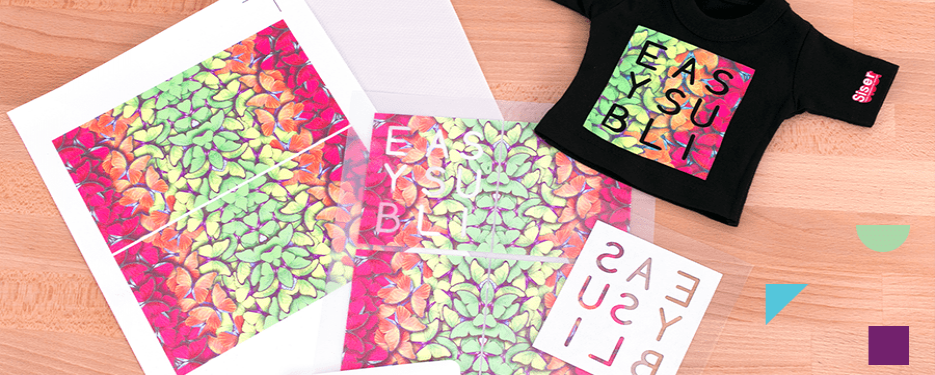
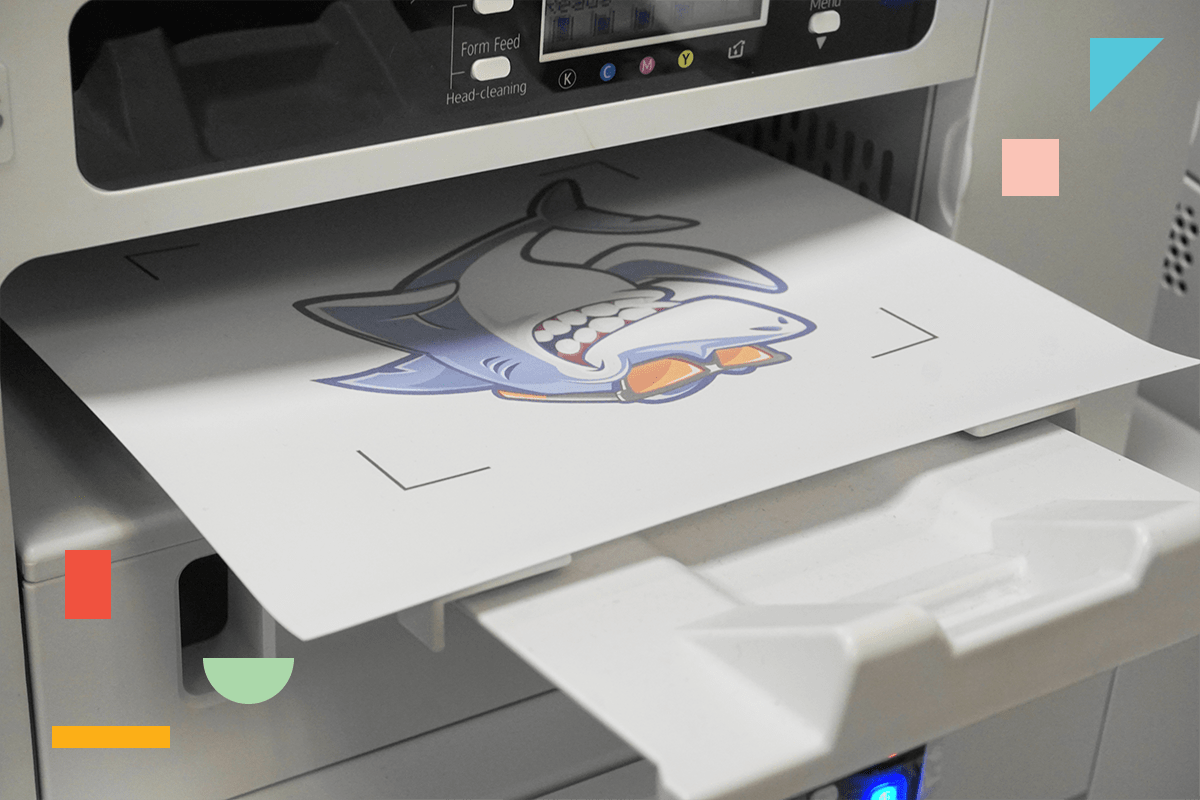
Next, load your Siser EasySubli heat transfer vinyl sheet into your printer's paper tray with the shiny vinyl side facing down (carrier facing up). If you are planning to run your design through your vinyl cutter after printing, set your registration marks on your design. Then, print to your EasySubli vinyl with your sublimation printer through the Siser Edition of Sawgrass SPM. In SPM, make sure you have your substrate and paper set to "Siser EasySubli vinyl." Note: do not mirror your image with this method.
After printing, let the ink dry on EasySubli vinyl. We suggest letting your printed vinyl sit under your open heat press platen for 60 seconds - or waiting 2 hours for the ink to dry. Note: when printing on EasySubli vinyl, do not send multiple prints through the printer and avoid any stacking as the ink may smear.
Step 4: Cut Your Vinyl & Weed
After your vinyl is completely dry, load it into the vinyl cutter and send your file to the cutter. After cutting, weed away the excess in your design. The great thing about EasySubli is it's very easy to weed, much like Siser EasyWeed!
If you don't plan on cutting your design, you may skip steps 4 and 5 and simply separate the vinyl from the carrier, apply the vinyl to the shirt, and press at the recommended times and temps in step 6.
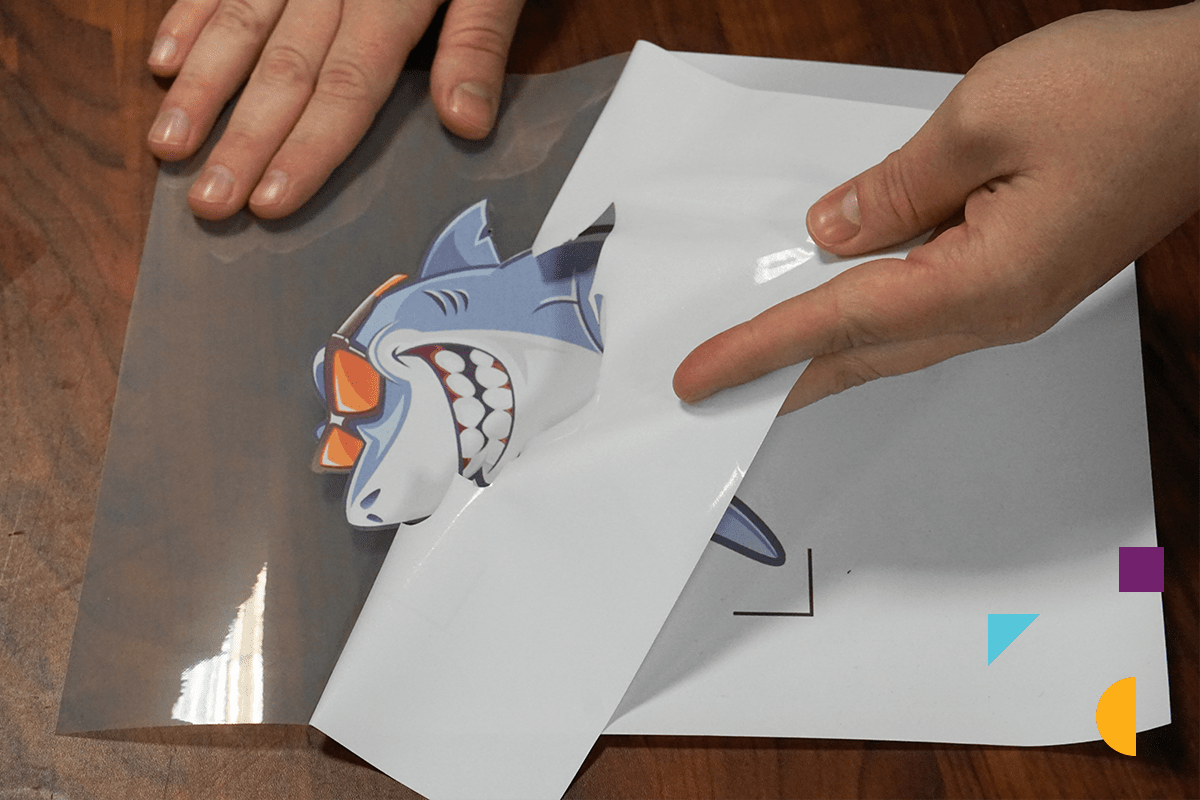
Step 5: Mask Your Transfer
After you've cut your design, you will want to mask it. This process is very similar to masking sign vinyl or Siser EasyPSV. Place your Siser EasySubli Mask on top of the exposed EasySubli vinyl and apply pressure with a squeegee to secure the bond. Then, lift the mask off gently, with the vinyl now adhering to the mask.
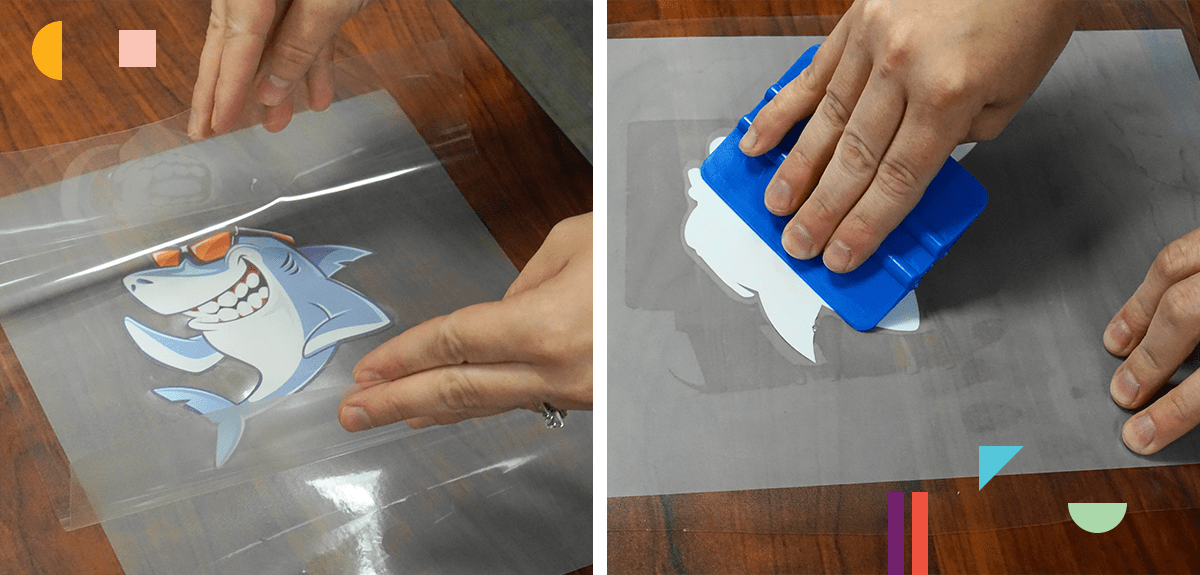
Step 6: Get Pressing!
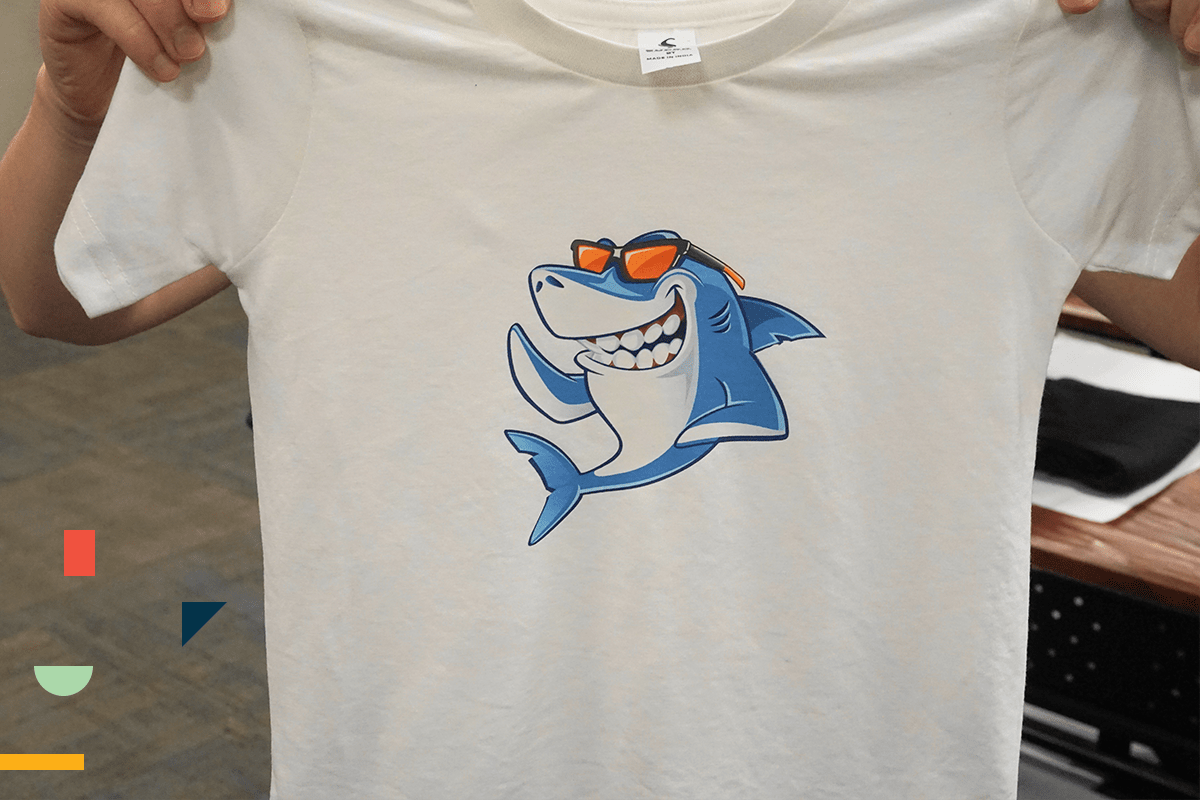
Now, it's time for your moment of glory! With your vinyl nicely adhered to your EasySubli Mask, place the transfer onto your shirt or garment.
Press with a silicone sheet on top at 311°F for 15 seconds at a medium pressure. Yes, we're for real - it's only 311 degrees for 15 seconds - much less time and temperature than traditional sublimation!
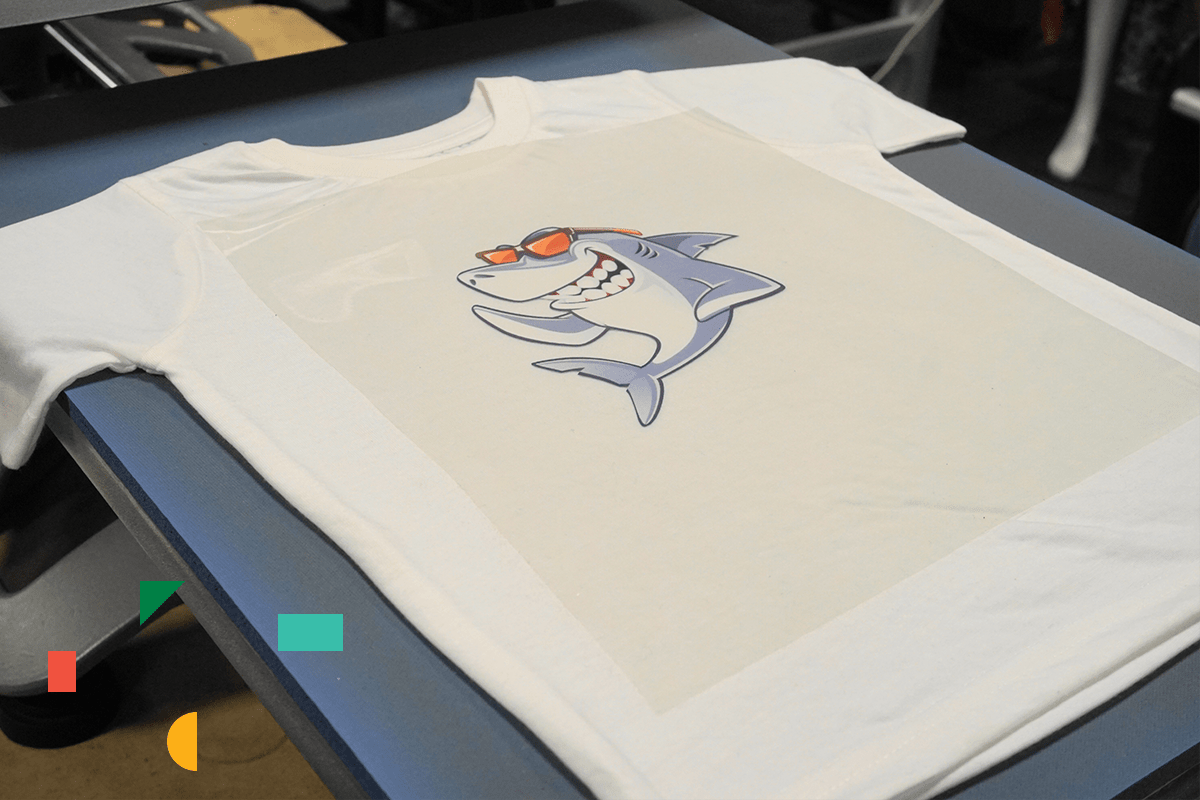
And that's it! Enjoy your personalized T-shirt with Siser EasySubli heat transfer vinyl! So, that's how you create custom tees using the Print & Cut method with Sawgrass' EasySubli ink.
Method #2 - The SubliJet HD Way
Supplies & Equipment You'll Need
- Sawgrass SG500 / SG1000 Printer with SubliJet UHD Ink
- Heat Press
- Siser EasySubli Heat Transfer Vinyl
- Siser EasySubli Mask
- Squeegee
- Weeding Tool
- PC or Mac with Sawgrass SPM (Sawgrass Print Manager)
If converting your SG400/SG500/SG800/SG1000 printer or purchasing a new system for EasySubli isn't in the budget, we've come up with another method for sublimating EasySubli HTV that will also work quite well. This method uses your standard SubliJet HD ink that you already have in your SG400/SG500/SG800/SG1000 printer. If you've ever sublimated on Siser Glitter, this method is going to sound pretty familiar.
Step 1: Print Your Design on Sublimation Paper
Create your design and send it to Sawgrass Print Manager, using the same process as you would for transferring to other sublimation blanks. For this, use the Sawgrass Edition (not Siser), SubliJet HD/UHD ink, and your standard sublimation paper. Print your design. Note: for this method, you will want to mirror your image.
Step 2: Cut Your EasySubli Vinyl
Load your vinyl cutter with your EasySubli HTV and send the same design file that you used to print to your cutter. After cutting, weed away the excess material.
Step 3: Mask Your Transfer
As is the same in the other method, after you've cut your design, you will want to mask it. Place your Siser EasySubli Mask on top of the exposed EasySubli vinyl and apply pressure with a squeegee to secure the bond. Then, lift the mask off gently, with the vinyl now adhering to the mask.
Step 4: Press the Vinyl
Now, place your masked vinyl (without your printed sublimation paper) onto your T-shirt and press it at 365°F for 5 seconds at a medium pressure. Then, peel hot.
Step 5: Press Your Printed Transfer
Lastly, place your printed sublimation paper on top of your transferred EasySubli vinyl and press again at 365°F for 60 seconds at a medium press. Again, you will peel hot.
And that's it! Enjoy your printed T-shirt! So that's how you will make custom apparel using the SubliJet HD/UHD method. Now, to answer a some of our frequently asked questions!
Frequently Asked Questions
Will EasySubli Ink Work on Other Substrates?
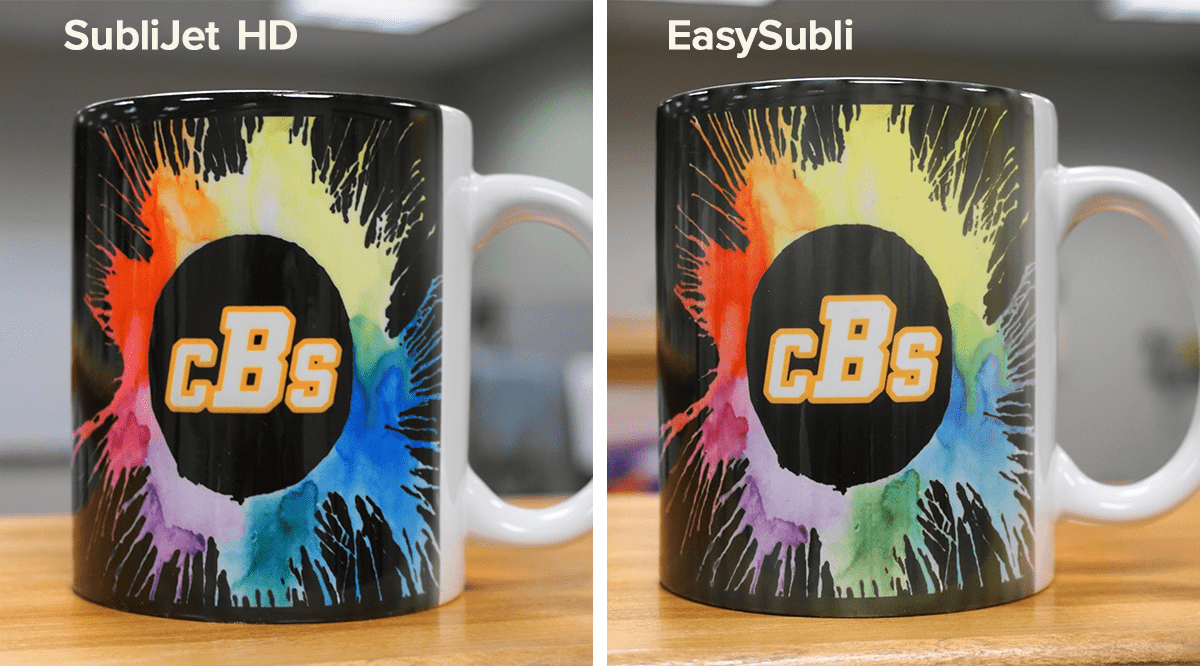
Yes-ish. While EasySubli ink was made to work with EasySubli heat transfer vinyl, it can also work for your other substrates. However, you will find that the transfers are considerably less vibrant with less consistent colors than using SubliJet HD ink. For this reason, we still recommend that you use SubliJet HD ink for all other substrates than EasySubli ink. In the photo below, we compare two mugs we made with SubliJet HD ink and EasySubli ink.
Can I Use EasySubli Ink in My Current SG400/SG500/SG800/SG1000?
You can! However, to do this, you have to convert your printer. You cannot simply swap back and forth between SubliJet HD/UHD and EasySubli ink. Instead, you will have to flush your entire system, which involves printing 160 full-bleed pages with the EasySubli ink. This process is actually more expensive than purchasing a new SG500 printer with Easy Subli ink. Also, if you decide to convert your printer, this will void your Sawgrass warranty, so do this at your own discretion. For these reasons, we generally recommend purchasing a new SG500 or SG1000 for EasySubli ink - or using method #2 as outlined above with your SubliJet UHD ink.
Can I Just Use My SubliJet HD/UHD Ink?
Yes! Please see method #2 above.
Can I Use EasySubli HTV with my Epson Sublimation Printer?
Yes, if you use a converted Epson printer for sublimation, you can use method #2 for printing on Siser EasySubli heat transfer vinyl. The times and temperatures may vary slightly, so we suggest starting with our recommended settings and adjusting as needed!
We hope you've found some valuable information in this Siser EasySubli guide! As always, if you have any questions, don't hesitate to reach out to the Coastal Customer Success Team at 800-562-7760 or by email at [email protected]. Feel free to tag your creations with #coastalbusiness for a chance to be featured on our social media pages!


0 Comments
Leave a Comment