How to Make Custom Tees with FOREVER Laser Dark Heat Transfer Paper
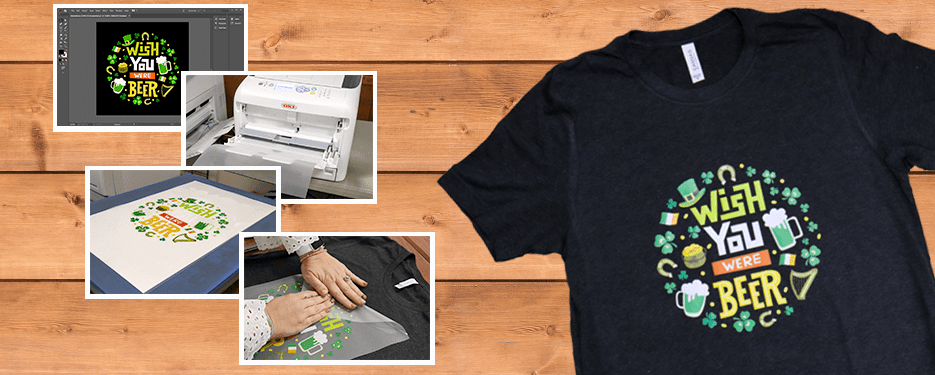
When it comes to making custom T-shirts, it’s hard to find a better solution than printing with FOREVER Laser Dark heat transfer paper. You can print on cottons and polyesters, dark and light-colored garments. Plus, with Laser Dark, there’s absolutely no weeding. This means you can print incredibly intricate designs (and even photos) without the pain of trimming around your image or spending exorbitant amounts of time weeding. Plus, FOREVER Laser Dark has a very soft hand/feel to it, so the T-shirts feel as good as they look.
Slow Down, What is FOREVER Laser Dark?
Good question – and let’s not get ahead of ourselves. If you’re new to the world of garment decoration, FOREVER Laser Dark is what is known as a laser heat transfer paper. It is one of the many methods you can use to create custom T-shirts and other garments – alongside screen printing, heat transfer vinyl, sublimation, etc. In other words, Laser Dark is a specialty paper that you print on with a laser printer and then apply heat to transfer your design to a T-shirt. The process is a bit more detailed than that, but we’ll explain it in full later on.
Okay Great, So What do I Need to Get Started?
1. A Laser Printer – Preferably an OKI White Toner Laser Printer
Before you run off purchasing FOREVER Laser Dark and planning your garment decoration empire, there are several things to know. The first is that you will need a laser printer. It is very important to note that FOREVER Laser Dark will not work with inkjet printers, which are the most common household printers. If you are uncertain of what kind of printer you have, check to see if your printer uses ink (a wet substance) or toner (a dry powder). If your printer uses toner, you have a laser printer. When in doubt, we recommend contacting the manufacturer.
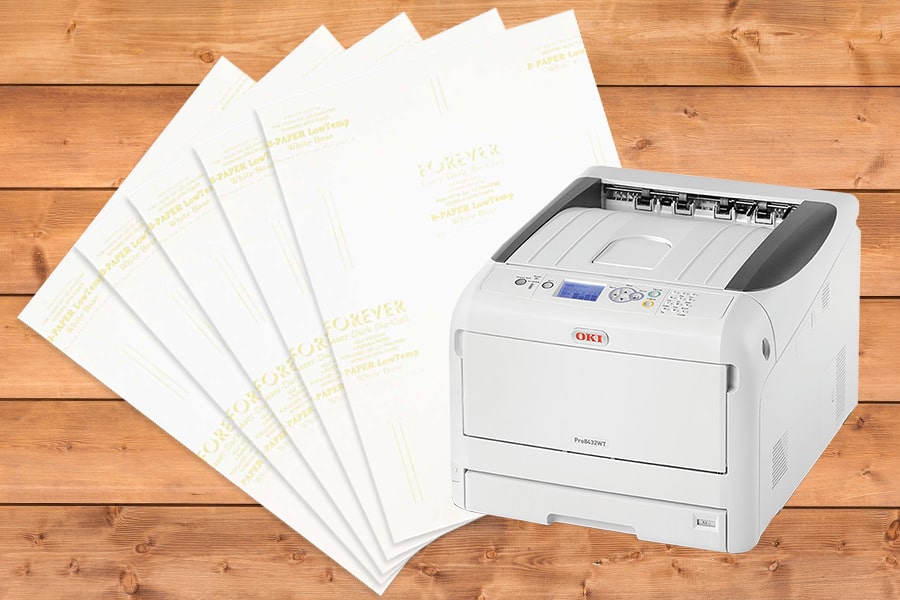
To get the most out of FOREVER Laser Dark, we highly suggest printing with a Crio White Toner laser printer. This style of printer is designed primarily for garment decoration as it uses a white toner in place of black. The white toner enables you to print virtually any color, especially lighter colors, which is necessary for printing photos. While FOREVER Laser Dark will work with many regular CMYK (black toner) laser printers, you will be limited to printing vector-based graphics with bold, solid colors that have a toner amount of 100% of higher. Without the white toner, you will not be able to print lighter colors such as pastel tones, skin tones and sky blues, and photos will not turn out as well.
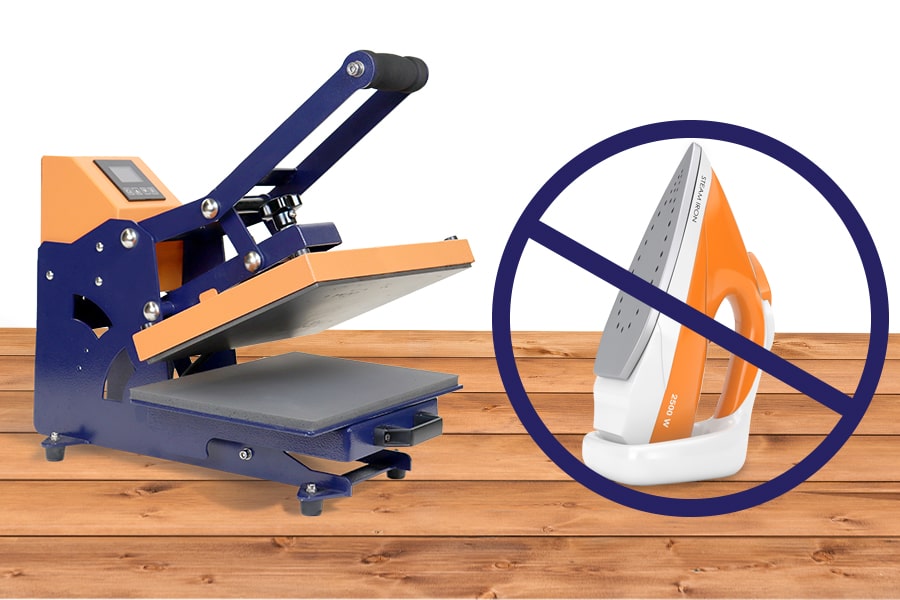
2. A Heat Press
If you’re already creating custom garments with heat transfer vinyl or sublimation, you’re in luck! You likely already own a heat press, so you can save yourself a bit of money. If you do not yet own a heat press, this is something you will need to start creating custom garments. A heat press is what facilitates the heat transfer portion of the garment decoration process. After printing your image to your FOREVER Laser Dark paper, you will place the printed paper on the T-shirt and press it for a specified amount of time at a certain temperature. This will cause the printed image to adhere to the T-shirt.
One question you might have is if you can use your home iron, and unfortunately, the answer is no. Unlike some iron-on transfer papers, FOREVER Laser Dark requires a heat press in order to ensure consistent heat application. A home iron simply won’t work. The good news is that heat presses are largely affordable, and you can get a great starter heat press for only a few hundred bucks. And with all the slick custom tees you’ll be making and selling, that heat press will pay itself off in no time.
3. FOREVER TransferRIP Software
A sometimes overlooked part of the process, FOREVER TransferRIP is your key to high-quality transfers with FOREVER Laser Dark and other FOREVER laser transfer papers. After creating your design to be printed in Photoshop, Illustrator, etc., you will import it into TransferRIP and prepare to print.
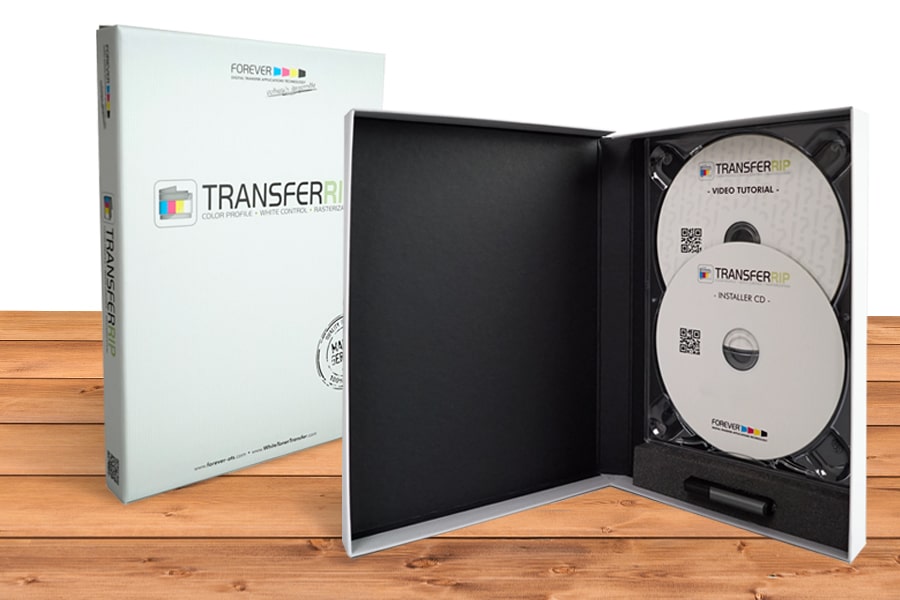
The benefits of printing with TransferRIP are numerous including color management controls, which allow you to edit the colors of your image and ensure they are as true to color as possible. TransferRIP also allows you to control the level of white toner that you print, which will save you up to 25% in white toner. Additionally, TransferRIP has the ability to rasterize your images. Rasterization is incredibly useful, especially for printing photos, as it essentially adds very small holes to your design. This increases the washability, durability and the feel of your images as well as saves you up to an additional 35% in toner. These small dots are only observable up close, and from a distance, you won’t notice a difference.
Lastly, FOREVER TransferRIP allows you to calculate the cost of your toner and consumables before sending the job to print. This can help you to accurately price your T-shirts and ensure your business is making the most profit possible.
4. Blank T-Shirts
One of the big benefits of FOREVER Laser Dark is that it works on all kinds of T-shirts. While other transfer papers may be limited to either cotton or polyester, light or dark garments, you can use FOREVER Laser Dark on any of these.
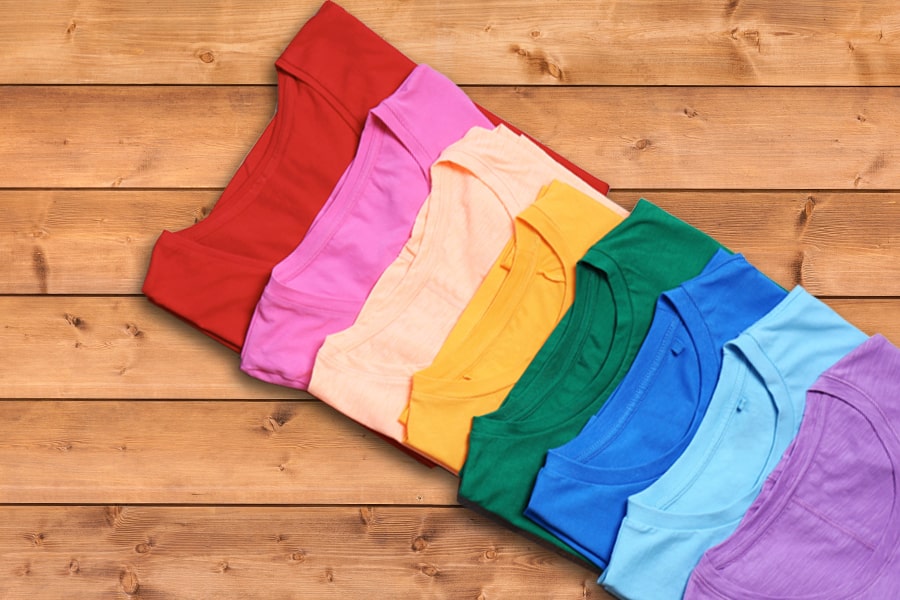
However, with FOREVER Laser Dark, we would recommend that you use it on darker-colored garments because if you are transferring to light-colored garments, you could use FOREVER Laser Light, which is a little less expensive and will do the trick.
5. Silicone-Treated Sheets
Something you will need for the heat transfer process is silicone-treated sheets. These cover sheets both protect the platens on your press from getting any toner or adhesive stuck to them. Additionally, you will use a silicone sheet in the last step of heat transfer – called setting.
6. FOREVER Laser Dark Transfer Paper
And last but not least, you will need the FOREVER Laser Dark transfer paper. One thing you will notice when you open your pack of Laser Dark is that it includes two different sheets: an A-Foil and a B-Paper. This is because FOREVER Laser Dark is what’s known as a two-step transfer paper. Put simply, the A-Foil is the sheet that you will print on with your laser printer. After printing, you will heat press the A-Foil and the B-Paper together, and the white opaque adhesive on the B-Paper will adhere to the only printed toner on the A-Foil. That’s step one. The second step is then pressing the A-Foil to the T-shirt.
This two-step process might seem a little involved or time-consuming, but it’s what makes the process self-weeding, and it actually saves you a lot of time over having to weed or cut the design out yourself.
Equipment and Supplies Checklist:
- Crio White Toner Laser Printer
- Heat Press
- FOREVER Laser Dark Transfer Paper
- Blank T-Shirt (Cotton, Polyester, Blends)
- Silicone-Treated Cover Sheets
- FOREVER TransferRIP Software
Awesome, I’ve Got My Supplies. Let’s Do This!
Now that you have your equipment and supplies, we are going to walk you through how to create a custom T-shirt with FOREVER Laser Dark transfer paper.
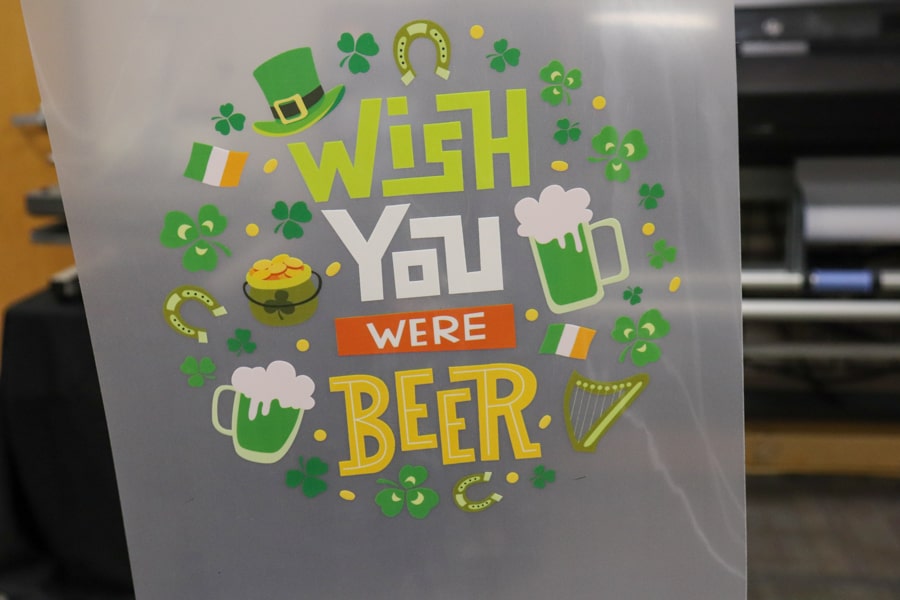
Step 1: Create Your Design
Create your design in your graphic software of choice such as Adobe Photoshop, Illustrator, or CorelDRAW. Save your image as a high-resolution file in one of the following formats: .png, .jpg, .pdf, .tiff, .psd, .eps. For most images you will want to print, you will find it ideal to save as a .png with a transparent background.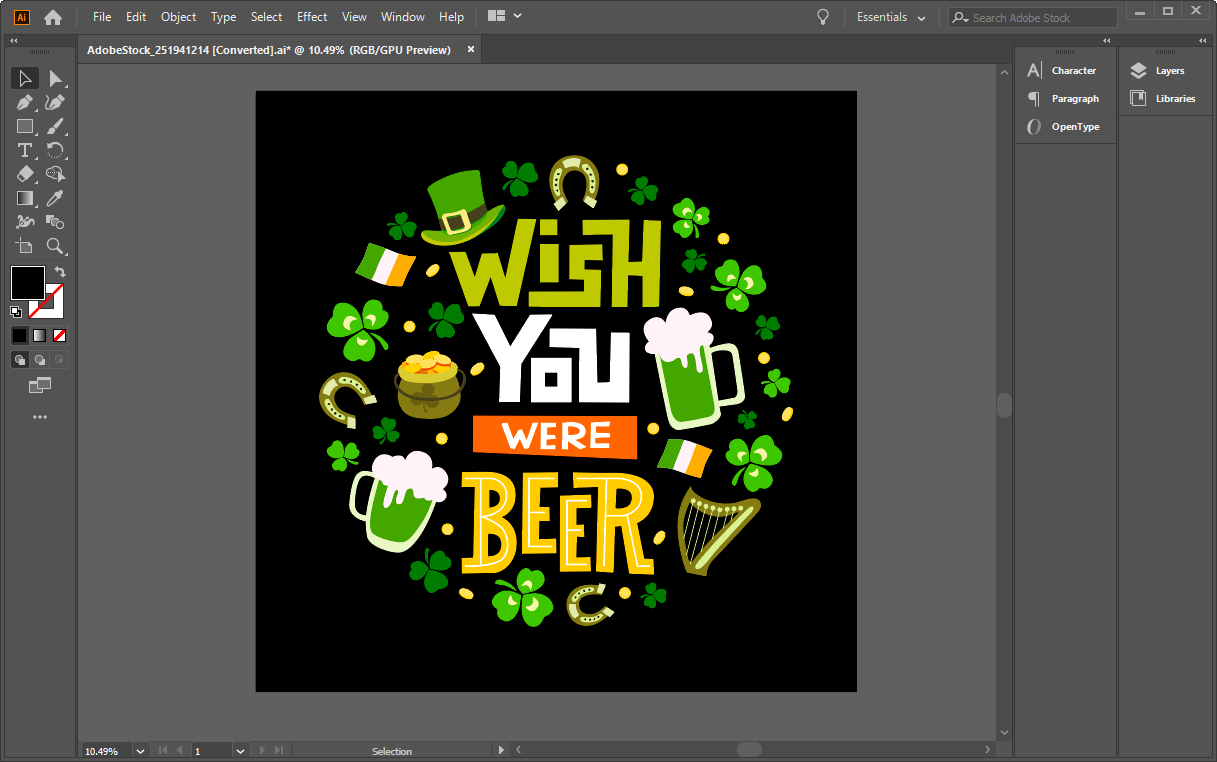
Step 2: Prepare Your Design in FOREVER TransferRIP
We highly recommend using TransferRIP for printing with FOREVER Laser Dark. However, it is not absolutely essential. If you do not have TransferRIP, you will want to print directly from your graphic software such as Adobe Illustrator - especially if you have a transparent background. If you are not using TransferRIP, go ahead and skip to step 3.
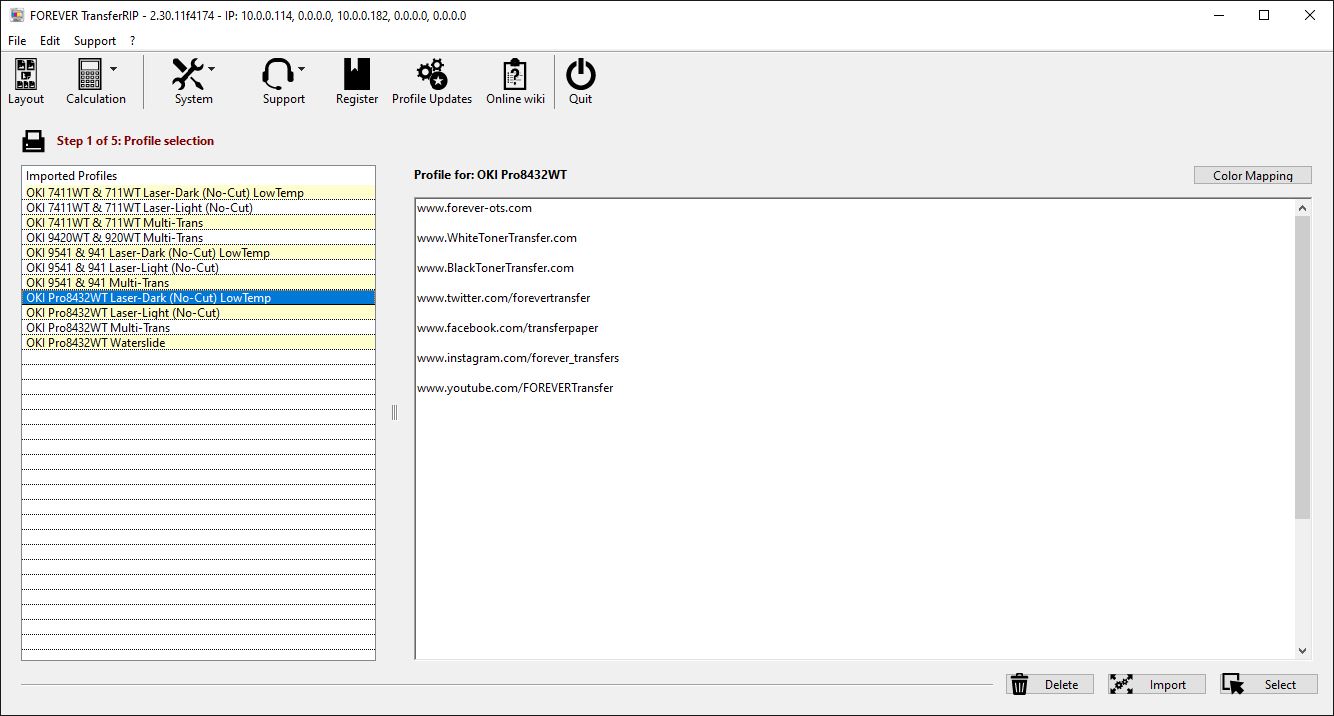
Once your FOREVER TransferRIP software is open, select your profile. Each profile corresponds to which printer you are using and which transfer paper. For us, we are printing on the OKI Pro8432WT printer, and we are using Laser Dark, so we will select that.
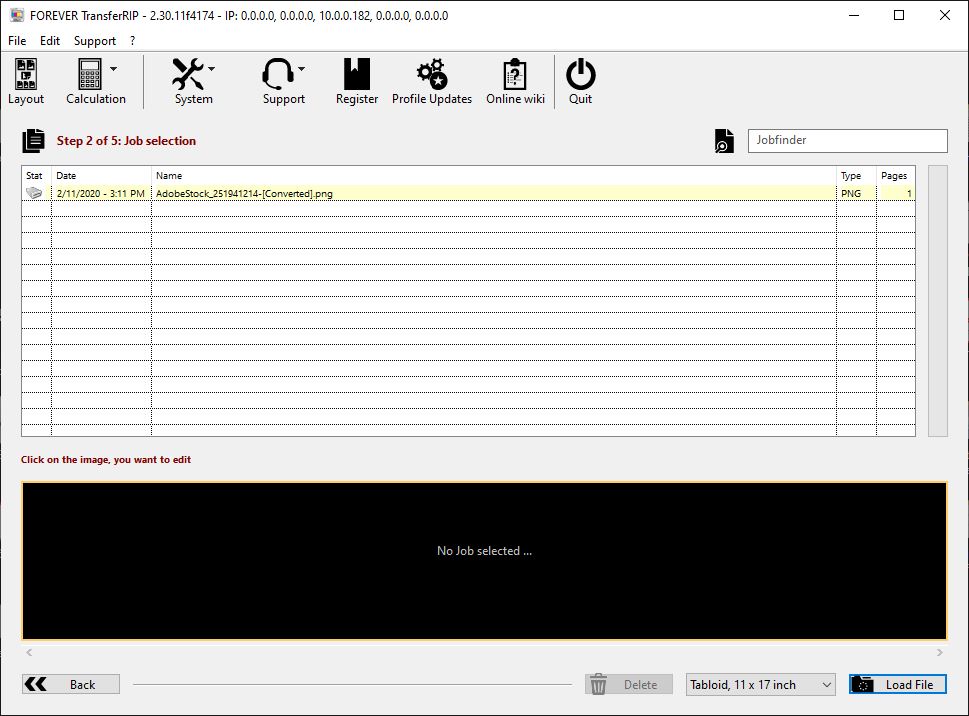
Then, load your design file and ensure that you select the correct size of your paper on the bottom right.
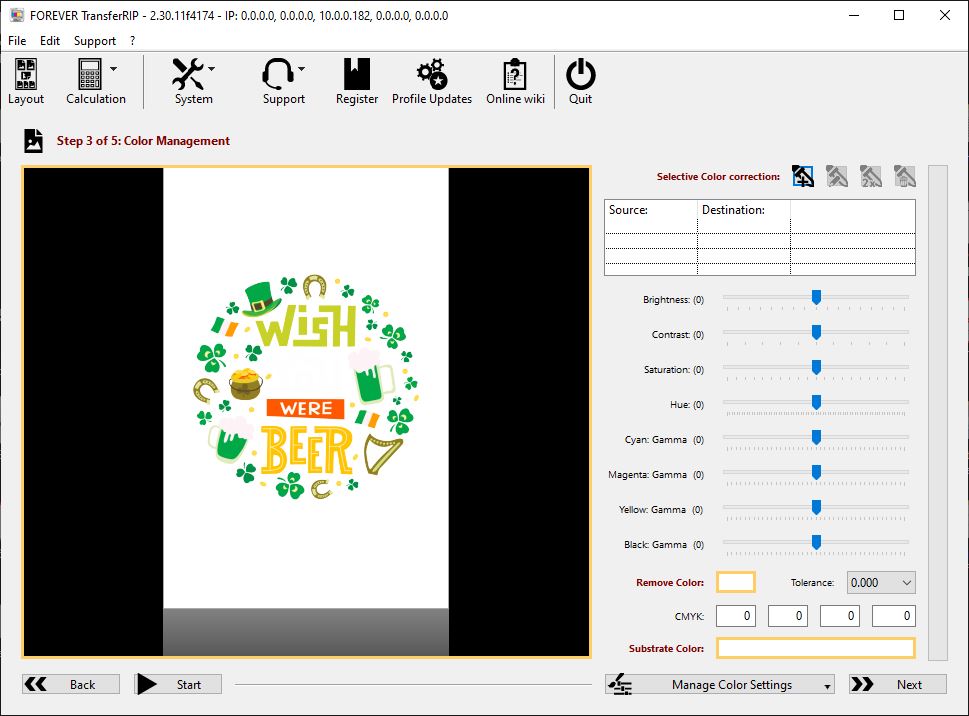
Once you’re at the color management step of FOREVER TransferRIP, you can adjust the colors of your design. You can adjust everything from brightness and contrast to hue and saturation. You can also remove certain colors from your print if so desired. At the bottom, you can adjust the color of your substrate, so you can see how your design will appear on different colors of T-shirts.
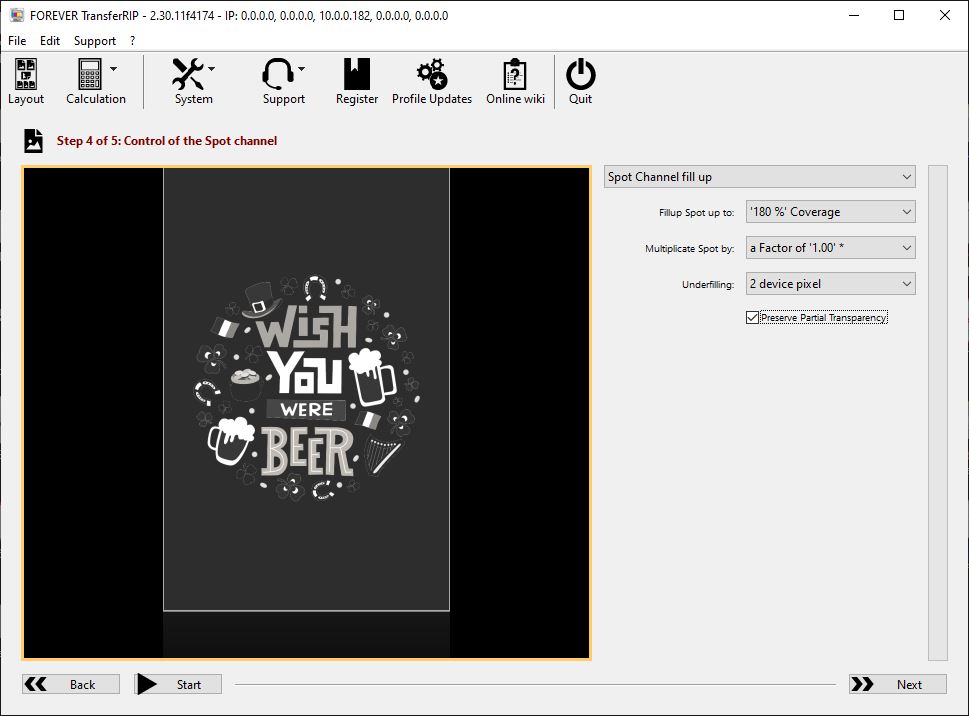
On the next page, you will want to adjust the “Fillup Spot up to” setting to between 150% and 200%. This number tells your printer how much white toner to print. The higher the percentage, the more white you will use. Leave “Multiplicate Spot by” and “Underfilling” as their default setting. Check “Preserve Partial Transparency” to help clean up any hangnails around your image and provide a cleaner print edge.
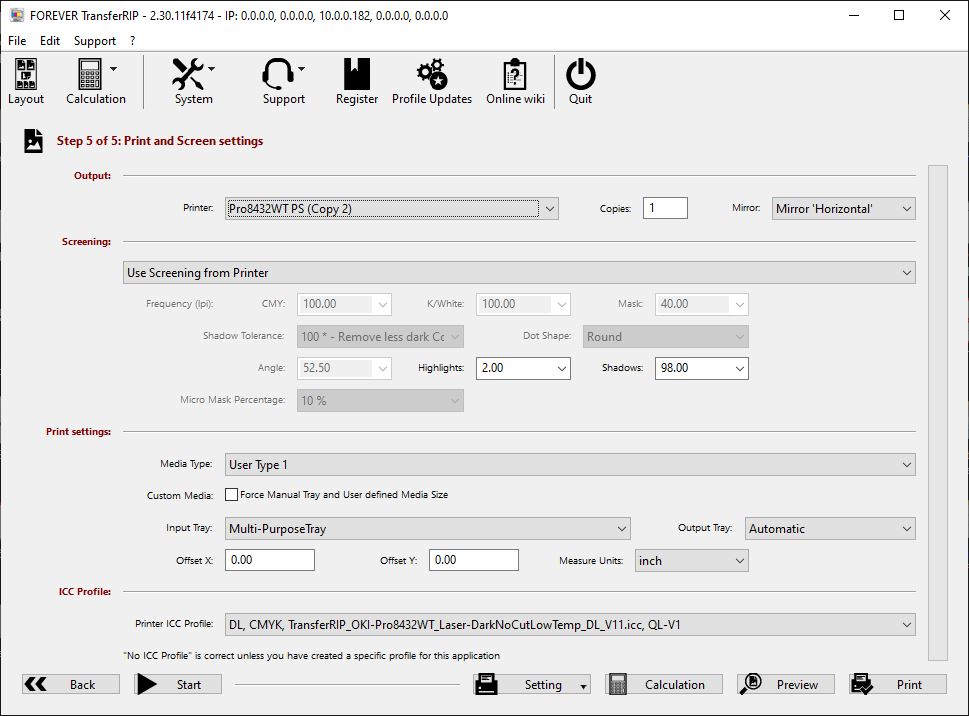
In the last step, you will verify that your print and screen settings are correct. Make sure you select the correct printer and verify that Mirror is set to Mirror ‘Horizontal.’ Under Print settings, if you have a Crio 8432WT or OKI PRO8432 printer, select “UserType 1.” For other OKI printers, select “Transparency.” For the input tray, you will want to select the Multi-Purpose Tray.
When printing with FOREVER Laser Dark on an Crio/OKI printer, you will always print from the Multi-Purpose Tray so that the paper feeds straight through the machine and exits via the back bypass tray.
That’s it! You’re ready to print. There may be other settings within TransferRIP that you would like to adjust, such as rasterization, and this guide is by no means comprehensive. Stay tuned for future blogs that will go into further detail on TransferRIP. If you have questions on FOREVER TransferRIP, do not hesitate to call our technical support team at 800-562-7760.
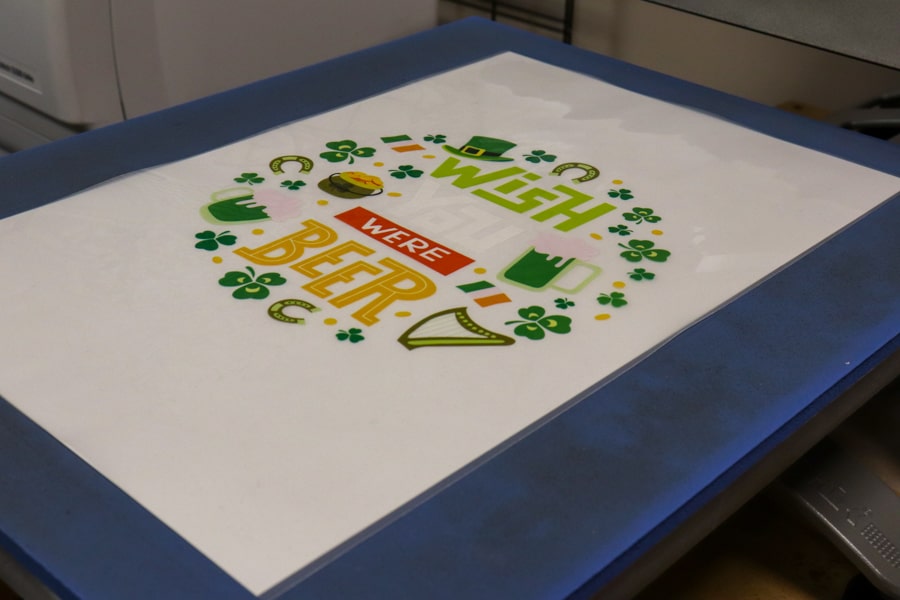
Step 3: Load Your A-Foil and Print
Before you hit “print,” make sure that you have your A-Foil sheet loaded in the printer. Remember that FOREVER Laser Dark comes with two different sheets: the A-Foil and B-Sheet. The A-Foil is the transparent sheet that you will be printing on, and you will use the B-Sheet in a future step.
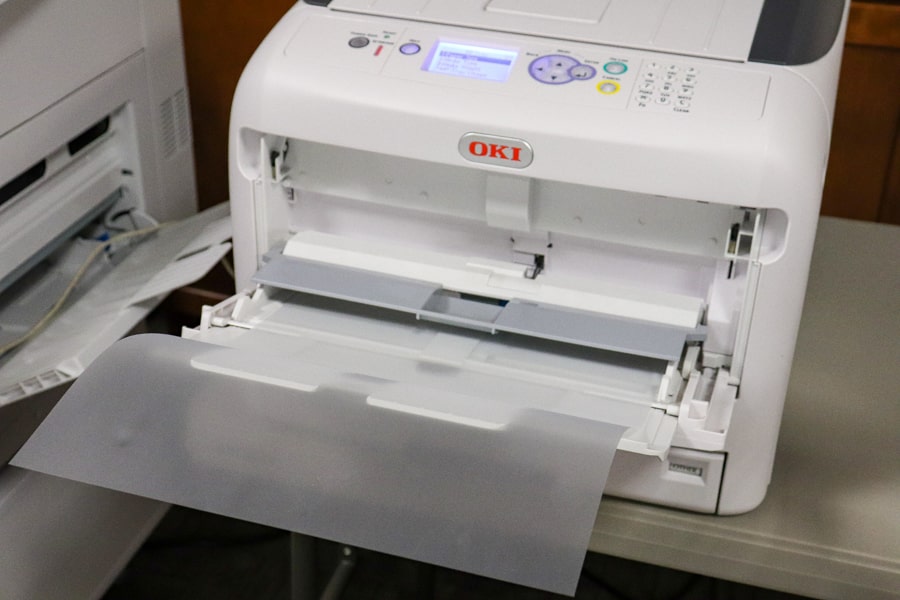
You will load the A-Foil into the printer with the matte/frosted side face-up. For Crio/OKI printers, the A-Foil will always go into the Multi-Purpose Tray – not the standard paper tray. Something important to note is that no matter which printer you are using, you cannot print from a regular paper tray as the paper must not bend. Therefore, your printer must feed the paper in straight (i.e. from the back to the front, or vice versa).
Once it’s loaded, go ahead and hit print! Let’s do this!
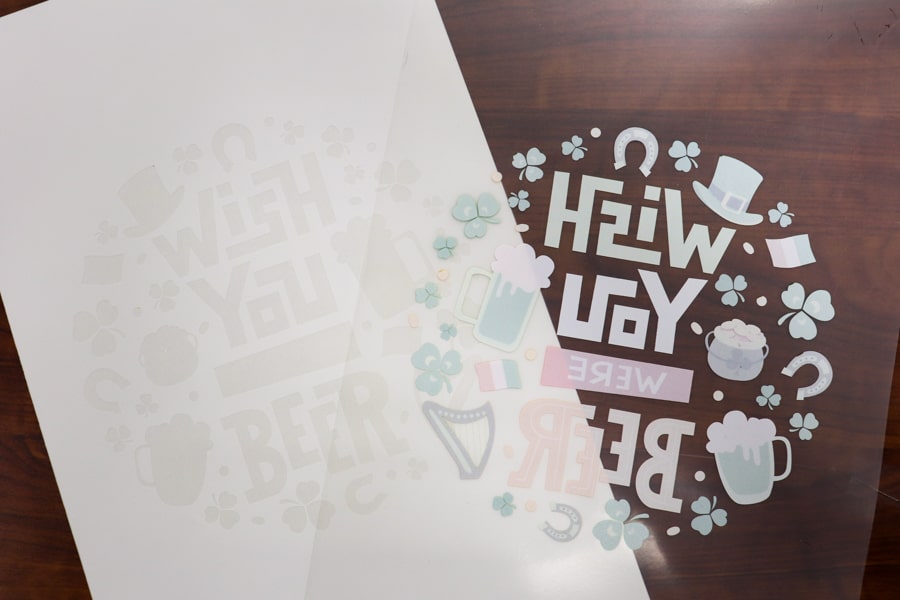
Step 4: Press the A-Foil and the B-Paper
After you have printed your design to the A-Foil, the next step is to press the A-Foil and the B-Paper together. This will cause the adhesive from the B-Paper to activate and transfer to only the printed sections on the A-Foil.
- Place the B-Sheet with the blank side face-up on the heat press. Then, place the A-Foil with the printed image face-down on the B-Sheet so that the two sheets are facing each other.
- Cover with a silicone-treated sheet.
- Press the two sheets at 300°F for 120 seconds with a medium pressure.
- After pressing, separate the B-Paper from the A-Foil immediately (hot peel) without lifting them up from the lower platen. Separate the sheets in a slow, low and fluid motion, peeling from one corner to the other.
- Once separated, using a pair of scissors to trim the edges of the A-Foil which will have an adhesive lining on it from the B-paper.
Step 5: Press the A-Foil to the Garment
Once the A-Foil and B-Paper have been separated, the next step is to press the A-Foil to the T-shirt.
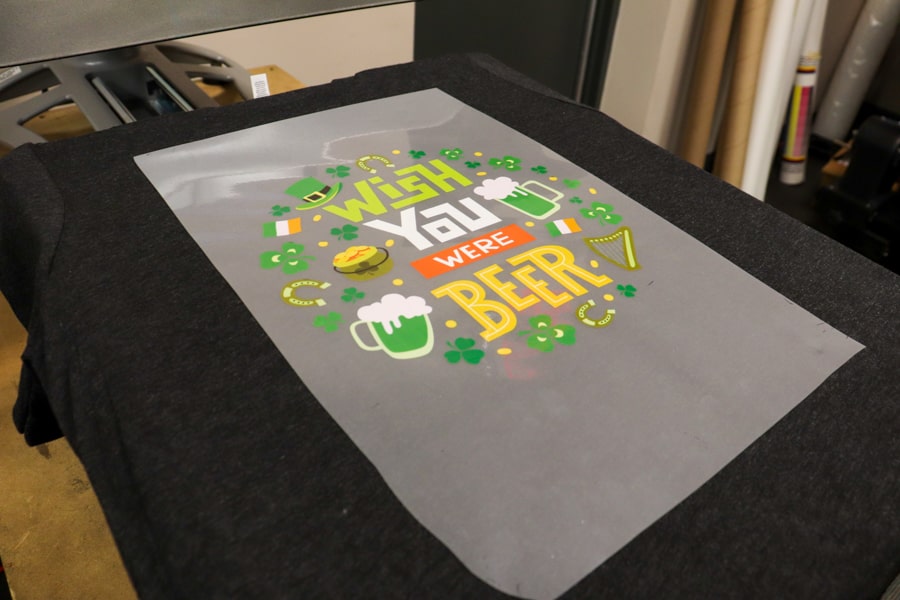
- Place your T-shirt on your heat press and pre-press it for 5-10 seconds to remove any wrinkles.
- Place your A-Foil on your shirt and press according to the settings below based on what you are pressing:
- Cotton: 300F for 30 seconds, medium to firm pressure
- Polyester: 265-285F for 30 seconds, medium to firm pressure
- Blend Fabrics: 285-300F for 30 seconds, medium to firm pressure
- Polypropylene: 220F for 30 seconds, medium to firm pressure
- Paper/Cardboard: 210F for 15 seconds, light pressure
- Book cover: 230-250F for 15 seconds, light pressure
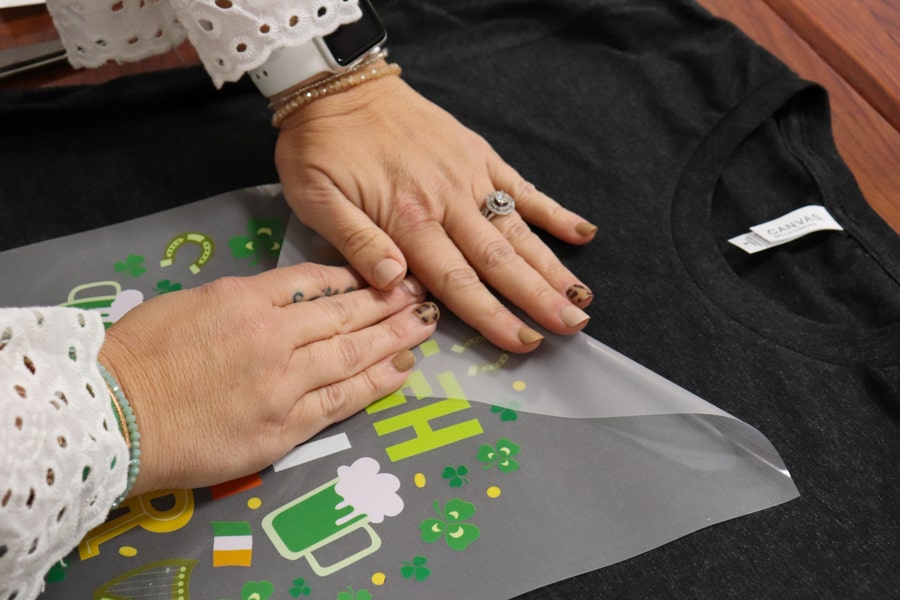
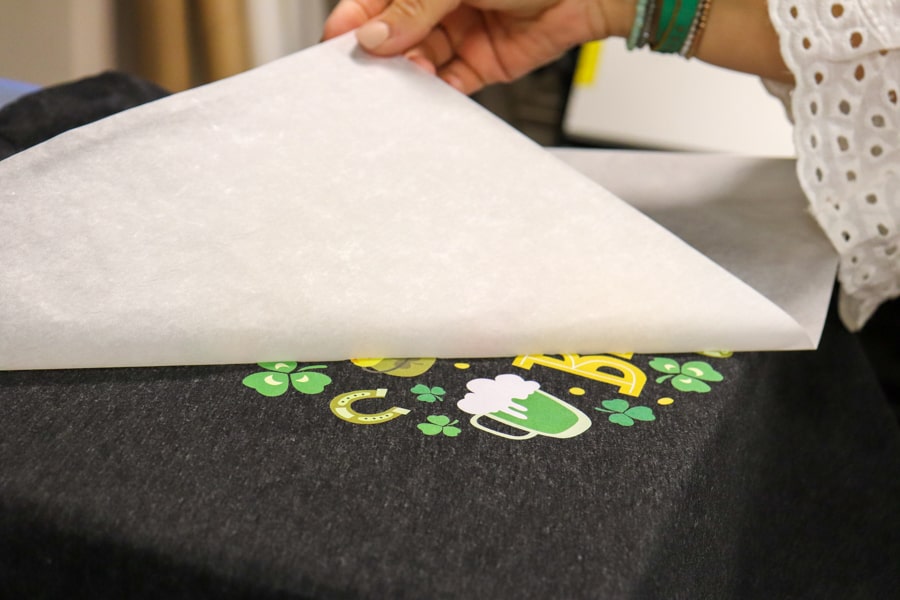
- Once pressed, remove your garment from the press and let your transfer fully cool (cold peel).
- Remove the A-Foil from the garment in a slow, low and fluid motion, peeling from one corner to another.
Step 6: Re-Press the Garment with a Silicone Sheet
In order to get the best washability and durability out of your printed T-shirt, we recommend pressing the T-shirt for an additional 30 seconds. Simply place your T-shirt in the press, cover the design with a silicone-treated sheet, and press for 30 seconds.
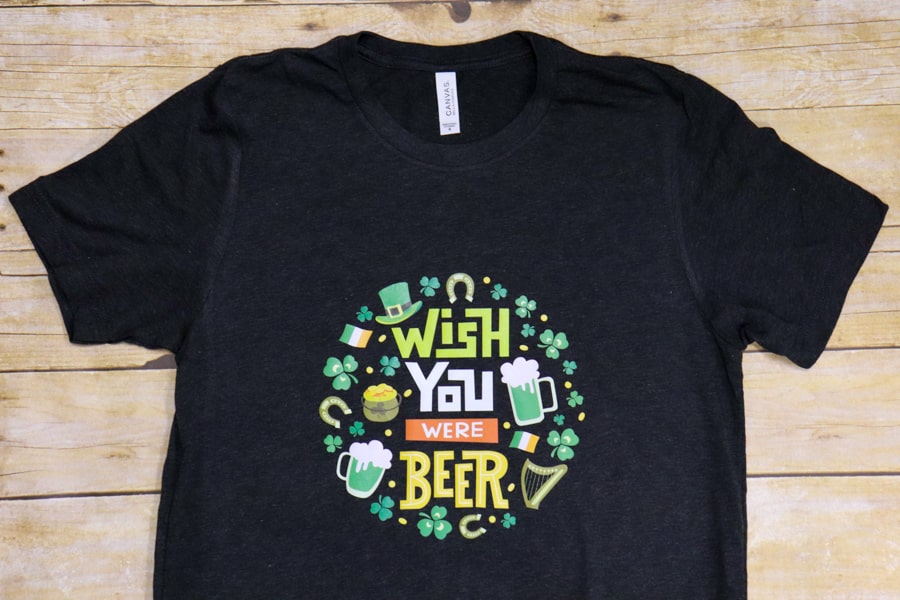
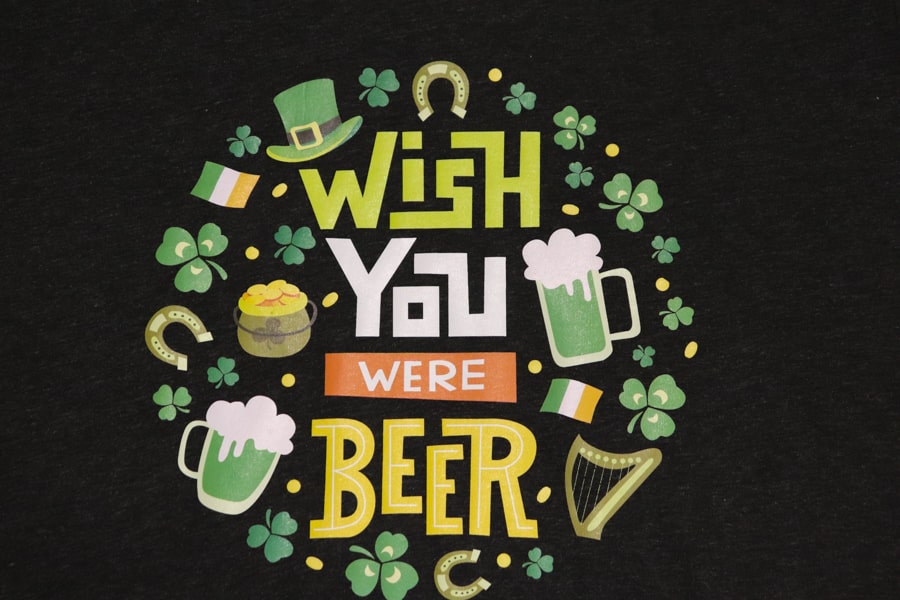
And you’re done! You’re now well on your way to creating snazzy custom T-shirts with FOREVER Laser Dark heat transfer paper.
We hope this blog proved useful, and if you have any questions at all, do not hesitate to reach out to our Customer Success Team by phone at 800-562-7760 or by email at [email protected].
We love to see your creations! Be sure to tag us on Instagram #coastalbusiness with your FOREVER Laser Dark transfers for a chance to be featured!


0 Comments
Leave a Comment