Tired of Sublimation Print Errors? Here’s Your Ultimate Troubleshooting Checklist!

Sublimation printing delivers vibrant, durable designs on apparel, mugs, tumblers, and more. But when prints come out dull, blurry, or marked, frustration spikes and profits dip. This comprehensive guide tackles the most common sublimation print errors and gives you clear, actionable fixes so every transfer looks sharp, saturated, and sale-ready.
Latest Insights in Sublimation Printing
- Advances in desktop and wide-format hardware now deliver tighter temperature accuracy and more stable color, which reduces transfer variability.
- Sustainable, non-toxic sublimation inks are becoming mainstream, offering reliable color while minimizing environmental impact.
- Demand for custom merchandise continues to grow across apparel and promotional goods, raising quality expectations and making efficient troubleshooting a competitive advantage.
- Understanding these trends helps you standardize workflows, reduce waste, and resolve issues faster.
Understanding Sublimation Printing
The Sublimation Process Explained
Sublimation uses heat and pressure to turn solid dye into gas, which bonds with polyester fibers or polymer coatings. Because the dye infuses into the substrate rather than sitting on top, finished products resist cracking, peeling, and fading. The three critical variables are temperature, time, and pressure combined with correct ink limits and moisture control.
Essential Equipment and Materials
Printers: Purpose-built sublimation printers or carefully converted inkjet models with compatible firmware and profiles.
Inks: Quality sublimation inks engineered for your printhead technology.
Paper: True sublimation transfer paper with consistent release and stable drying.
Heat Press: Reliable press with accurate temperature, even pressure, and repeatable timing.
Supporting Tools: Heat-resistant tape, protective sheets, lint roller, moisture control solutions, and a thermometer or heat strip for verification.
Common Sublimation Print Errors and Their Solutions
Faded or Dull Colors

➣ Likely causes
- Insufficient temperature or dwell time
- Low polyester content or incorrect substrate coating
- Old or low-quality inks, clogged nozzles, or the wrong color profile
➣ Fix it fast
- Verify your heat press with a surface thermometer and match the substrate’s recommended time and temp.
- Use fabrics with 65%+ polyester or hard goods with true poly coatings.
- Run a nozzle check, install fresh cartridges, and apply the correct ICC profile with the right media setting.
- Increase image saturation slightly in the RIP or driver only after verifying press accuracy.
Blurry or Ghosted Images
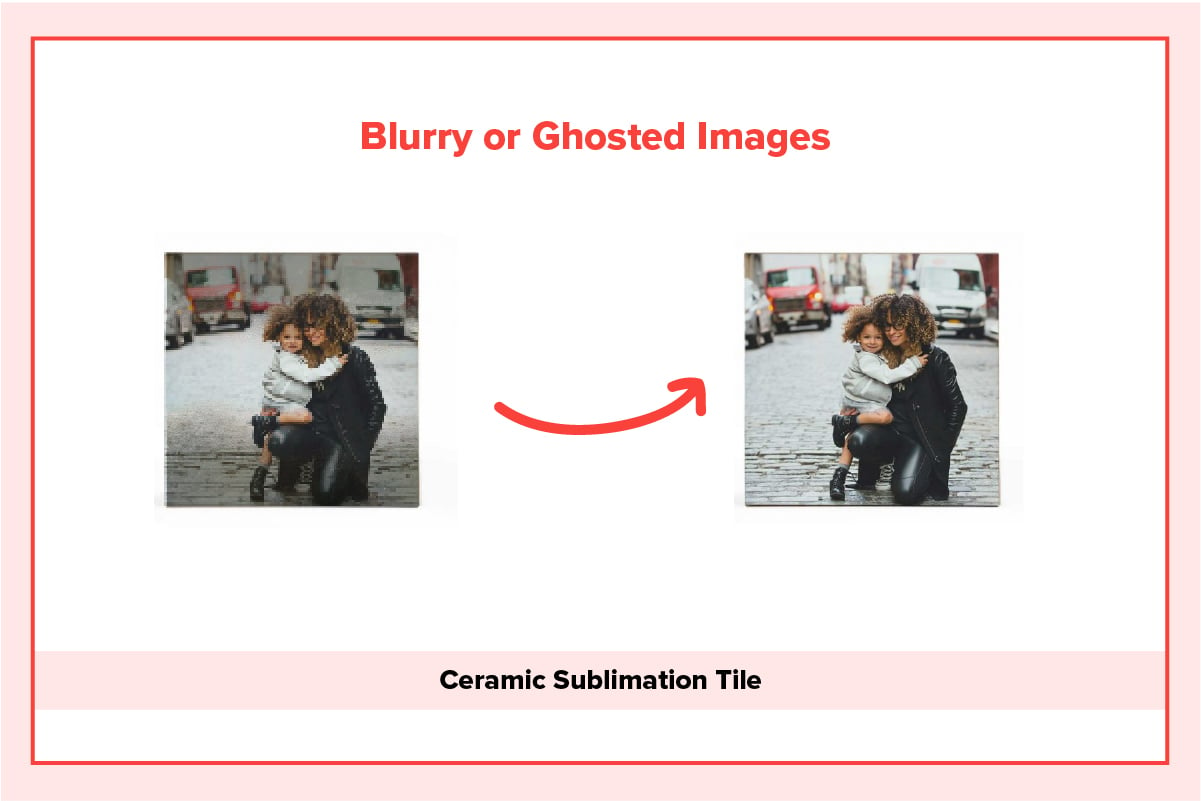
➣ Likely causes
- Transfer paper or substrate shifted during pressing
- Residual moisture in paper or substrate
- Opening the press too fast while the dye is still gassing
➣ Fix it fast
- Secure transfers with heat-resistant tape at multiple points without stretching the print.
- Pre-press garments 5–10 seconds and let paper acclimate in a low- humidity environment.
- After the cycle, crack the press slowly and let the substrate stabilize for a second before removing paper.
Uneven or Spotty Transfers

➣ Likely causes
- Uneven pressure from a warped platen or worn pad
- Lint, dust, or oils on the substrate
- Cold spots on the press
➣ Fix it fast
- Check pad condition and confirm even pressure corner-to-corner using a simple paper pull test or pressure test strips.
- Lint-roll garments, wipe hard blanks with a lint-free cloth, and avoid touching print zones.
- Map your platen with temperature strips; service or replace components if heat variance exceeds spec.
Ink Smudging or Bleeding

➣ Likely causes
- Over-saturated prints from excessive ink limits or the wrong media setting
- Press temp or time too high, causing excessive dye migration
➣ Fix it fast
- Choose the correct media/paper setting and ICC profile to lower total ink.
- Dry freshly printed sheets before pressing; avoid stacking warm sheets.
- Reduce temp or time in small increments and retest.
Transfer Lines or Press Marks

➣ Likely causes
- Edges of transfer paper embossing into fabric
- Excessive pressure or very soft textiles
➣ Fix it fast
- Tear, don’t cut, the paper edges to create a feathered border.
- Use a pressing pillow or foam pad to elevate seams and reduce edge imprinting.
- Lower pressure slightly while maintaining dwell time and temperature.
Banding or Horizontal Lines

➣ Likely causes
- Clogged nozzles or misaligned printhead
- Incorrect driver resolution or bi-directional settings
➣ Fix it fast
- Run nozzle checks, cleanings, and head alignments per manufacturer guidance.
- Print at a resolution that matches paper and image detail; enable high- speed off if banding persists.
Orange Cast, Color Shifts, or Muddy Blacks
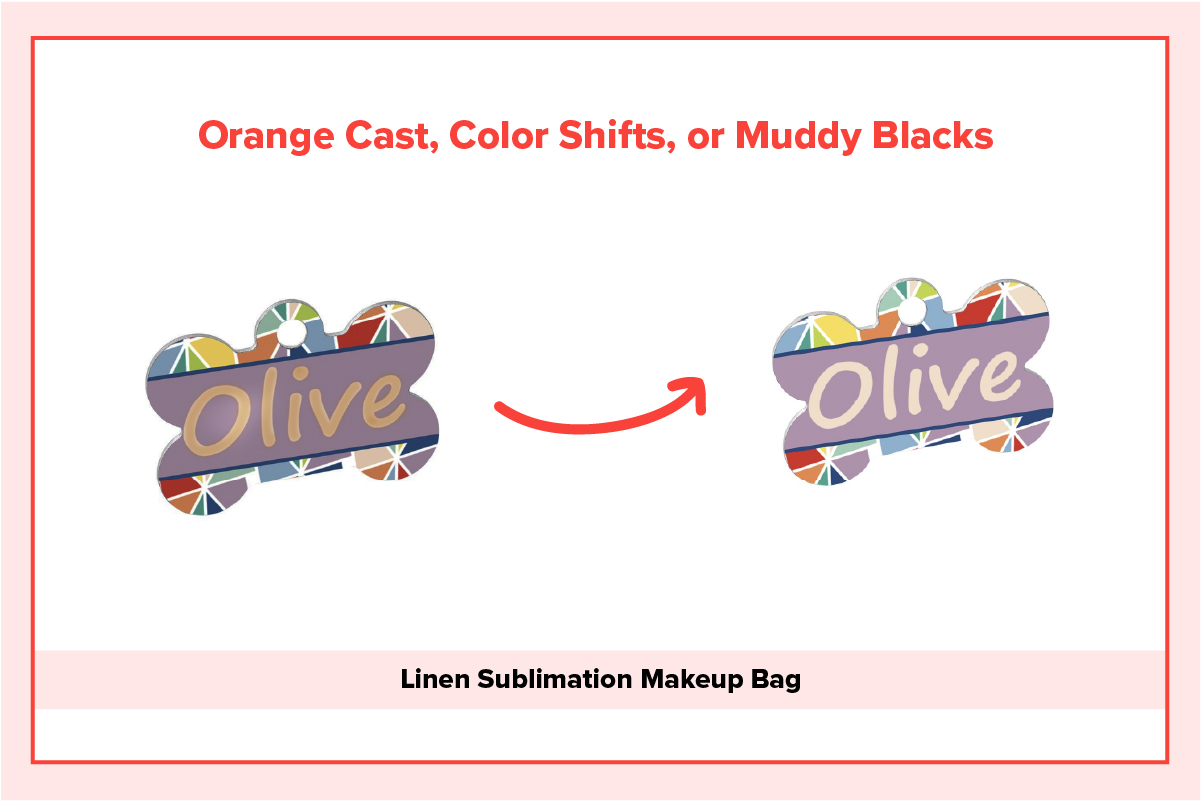
➣ Likely causes
Wrong ICC profile, wrong black generation, or incompatible driver settings
Old paper or mixed ink batches
➣ Fix it fast
Use the exact ICC profile for your printer, ink, and paper combo, and disable color management in duplicate locations to avoid double profiling.
Standardize supplies and lot numbers where possible; reprofile if you change any component.
Moisture Spots
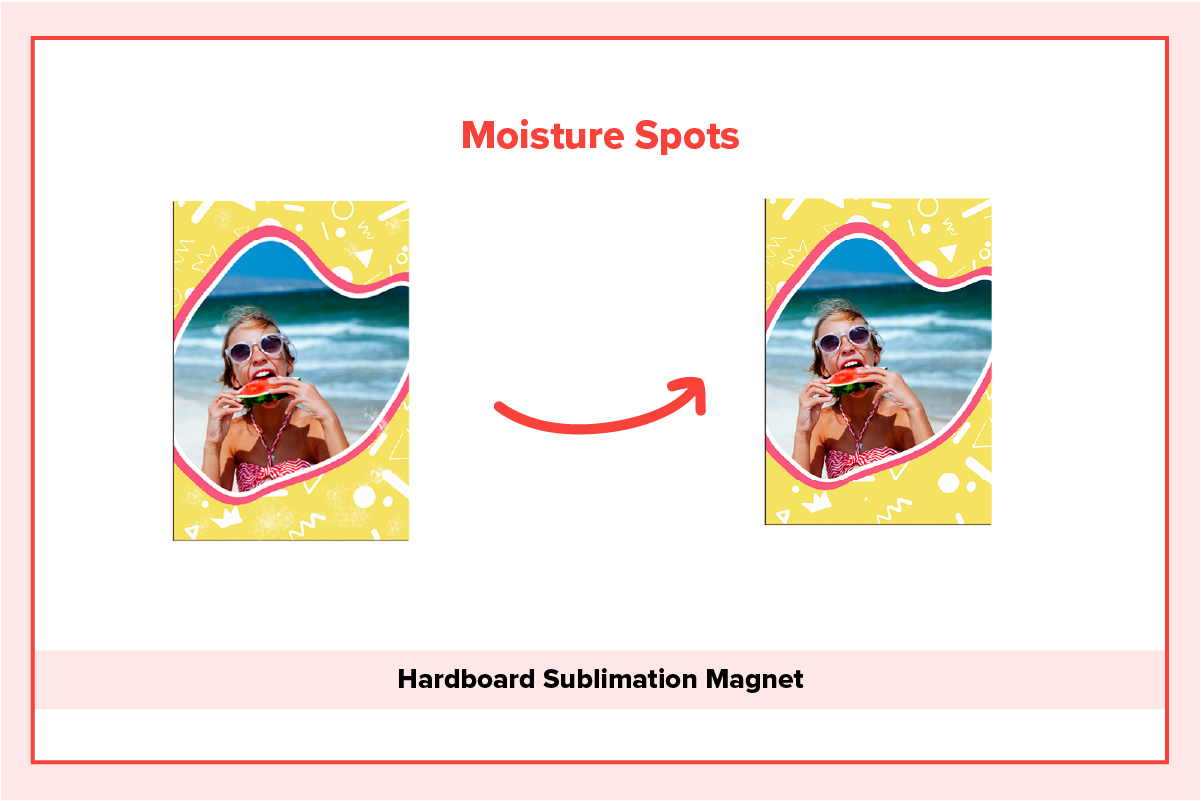
➣ Likely causes
High humidity, substrates stored in damp rooms, or insufficient pre-press
➣ Fix it fast
Store paper and blanks in climate-controlled conditions and use desiccant where needed.
Pre-press textiles and let hard goods acclimate to room temperature before pressing.
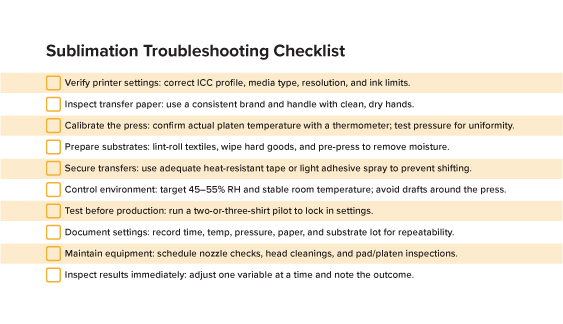
Preventative Measures for Consistent Results
- Perform routine printer maintenance including nozzle checks and head alignments to prevent banding and color drift.
- Keep the press platen clean and replace worn silicone pads to maintain even pressure.
- Standardize inputs by sticking to a single paper brand, ink set, and profiles to reduce variability.
- Manage humidity and temperature with a hygrometer and dehumidifier or humidifier as needed.
- Create SOPs that define artwork setup, print settings, tape placement, press parameters, and inspection steps.
- Invest in training and stay current with best practices through vendor guides, webinars, and community forums.
Pro Workflow Tips That Save Time and Materials
- Tile your page with multiple small transfers but leave at least a half inch between designs to minimize heat buildup and cross-contamination.
- Dry prints briefly under gentle airflow before pressing, especially with heavy coverage.
- Use protective sheets appropriately: blowout paper above and below to protect the platen and absorb stray dye.
- For mugs and tumblers, secure wraps evenly and confirm full contact around the curve to prevent light areas and ghosting.
- When switching substrates, re-test. Even similar blanks can require different dwell times due to coating thickness.
Perfect sublimation results come from controlling variables—ink, paper, substrate, heat, time, pressure, and environment. With this guide, you can diagnose the most common sublimation printing issues quickly and apply precise fixes that boost color, clarity, and durability. Build your workflow around the troubleshooting checklist, document your winning settings, and you’ll see fewer misprints, less waste, and more five-star customer reviews.
FAQs
- Why are my sublimation prints coming out dull?
Dull results usually point to low temperature or time, low polyester content, or aging inks. Verify the press with a thermometer, use substrates with sufficient polyester or true poly coatings, and replace inks as needed. Apply the correct ICC profile for your ink and paper. - How can I prevent ghosting in sublimation printing?
Secure the transfer with heat-resistant tape, pre-press to remove moisture, and open the press slowly to avoid suction and movement while the dye is still gassing. - What causes ink smudging during sublimation?
Over-saturation and too much heat or time are the usual suspects. Reduce ink limits via the correct media setting and ICC profile, allowing prints to dry, and fine-tune temperature and dwell. - Why are there lines on my sublimation prints?
Embossed paper edges and excessive pressure can leave marks. Feather the paper edges by tearing, use a pressing pillow for seams and zippers, and reduce pressure slightly. - How often should I maintain my sublimation printer?
Follow the manufacturer’s guidance. As a rule of thumb, perform nozzle checks weekly and clean heads monthly, or more often in high-volume or low-humidity environments. Keep the press platen clean and inspect pads regularly.


0 Comments
Leave a Comment