Free Sublimation Templates and How to Use Them
Looking for free sublimation templates? You’ve come to the right place! At Coastal, we provide sublimation templates for all our sublimation blanks – free of charge – in .PDF format for design programs like Adobe Photoshop and .EPS for Adobe Illustrator and CorelDRAW.
Whether you’re just getting started with sublimation or a seasoned veteran, we highly recommend using templates when printing as they are a huge time-saver and can help you avoid costly errors. This is because sublimation templates provide a general guideline of your sublimation blank’s shape and size, so you know that the transfer you print will fit your physical product.
In this article, we will discuss the sublimation templates that we provide and show you where to find them and how to use them, so you can get up and running fast!
If you’re just looking for the templates and would like to skip the tutorial below, you will find the sublimation templates on every product page on our website under the “downloads” tab. Simply search for the product you’re looking for on coastalbusiness.com, click on the downloads tab, and download your templates! Enjoy!
What is a Sublimation Template?
If you’re just getting started with sublimation, you may be wondering what a sublimation template is and why you even need one. Sublimation templates are premade design files that provide general guidelines of the image size that you will want to print for your product. They conform to the size and shape of your sublimation blank, and most of our templates include a small bleed (that is, printing that goes beyond the edge of the substrate) which covers you in case your item shifts slightly during heat transfer.
Sublimation templates are super useful as they take the guesswork out of what size your substrate is and how big of a design you need to print. Just simply pop your design into the template, print, and heat press it! Without a template, you may find yourself printing your design a few times to get the size just right, which wastes not only ink and paper but also your valuable production time.
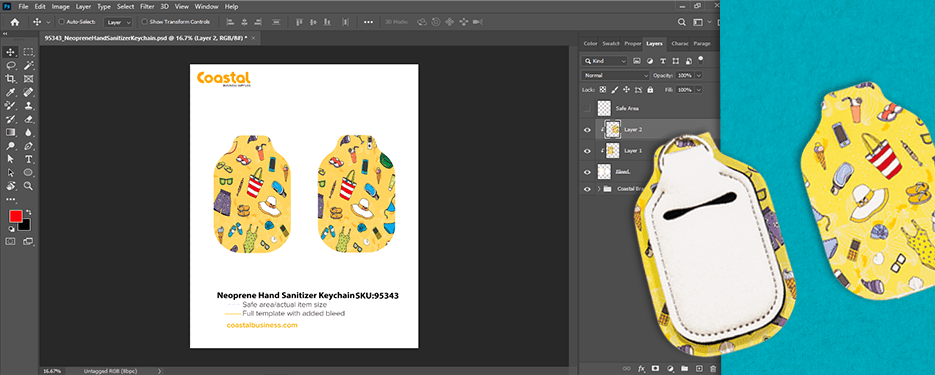
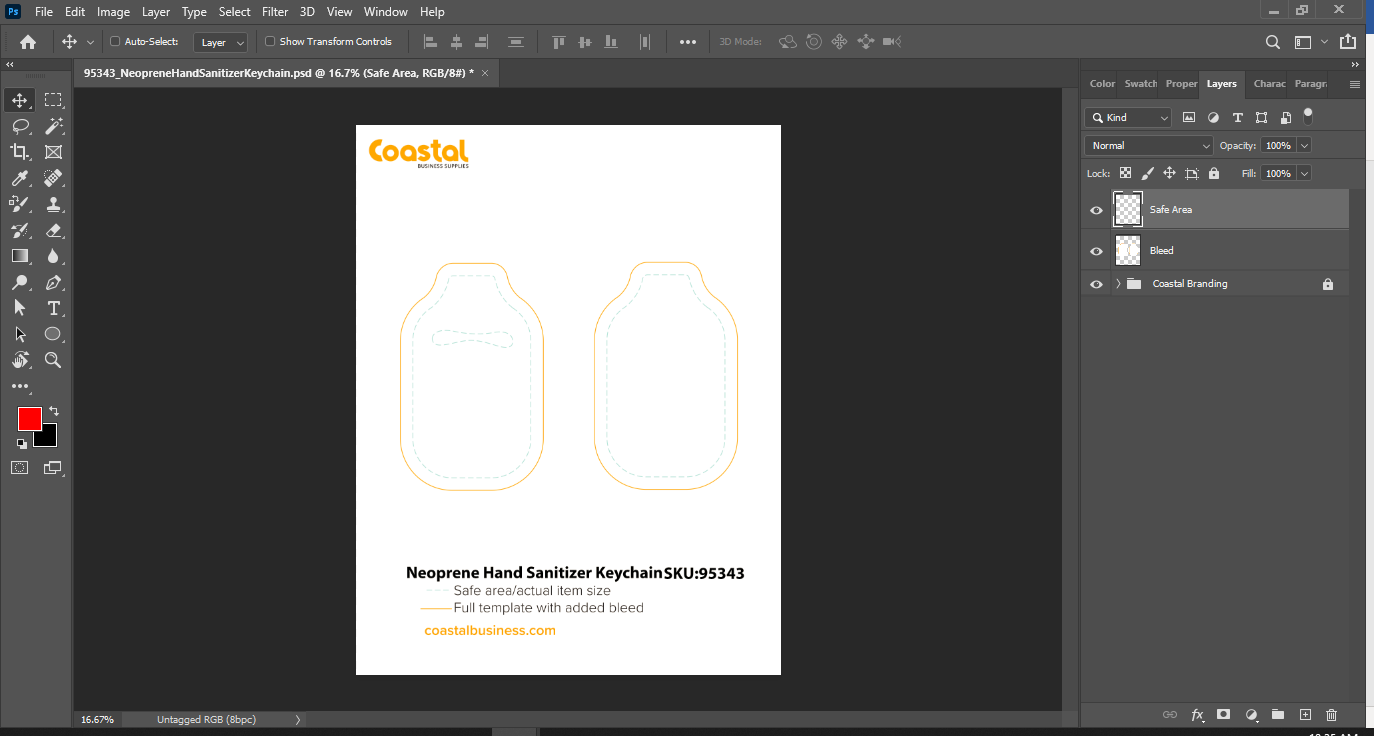
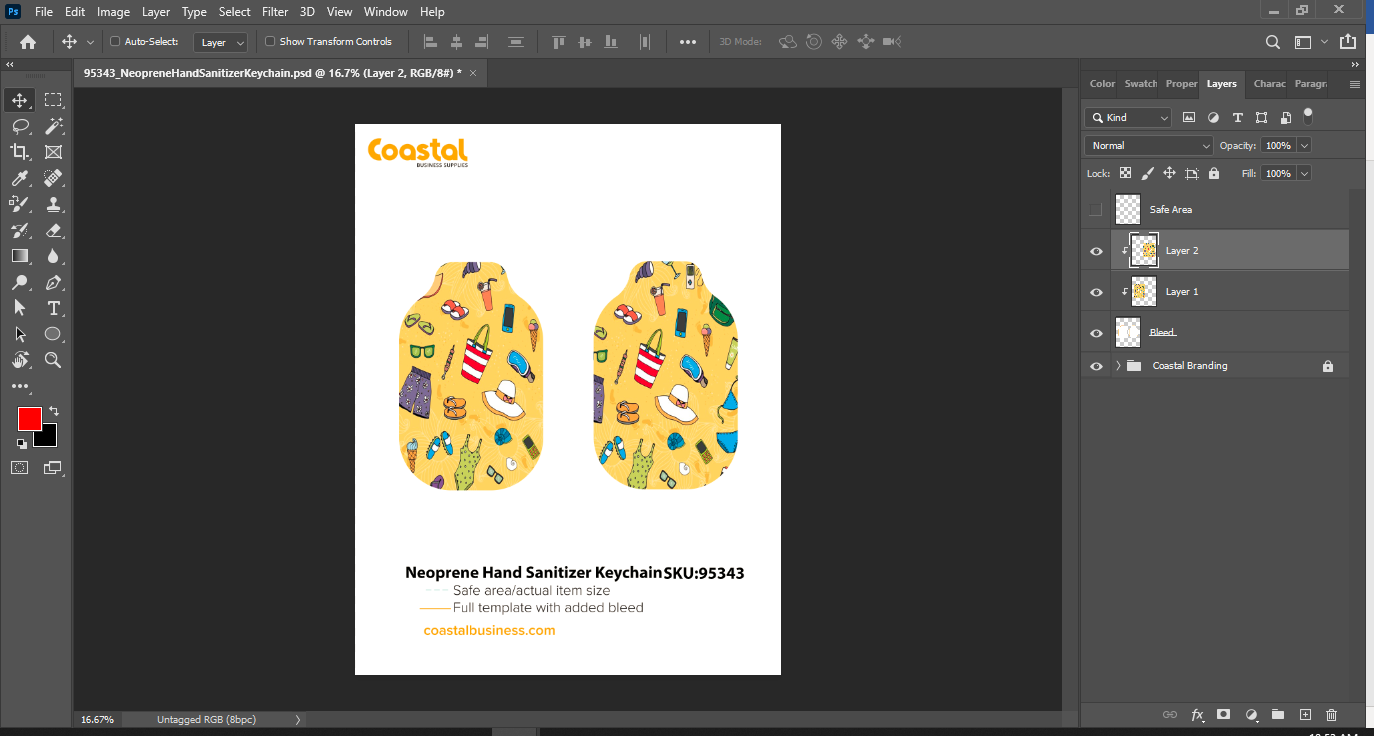
Below, you will see a template we made for our neoprene hand sanitizer keychain holders. In this image, you can see the item size, the bleed layer, and our Coastal branding.
Okay, Cool. So, Where Do I Find Your Sublimation Templates?
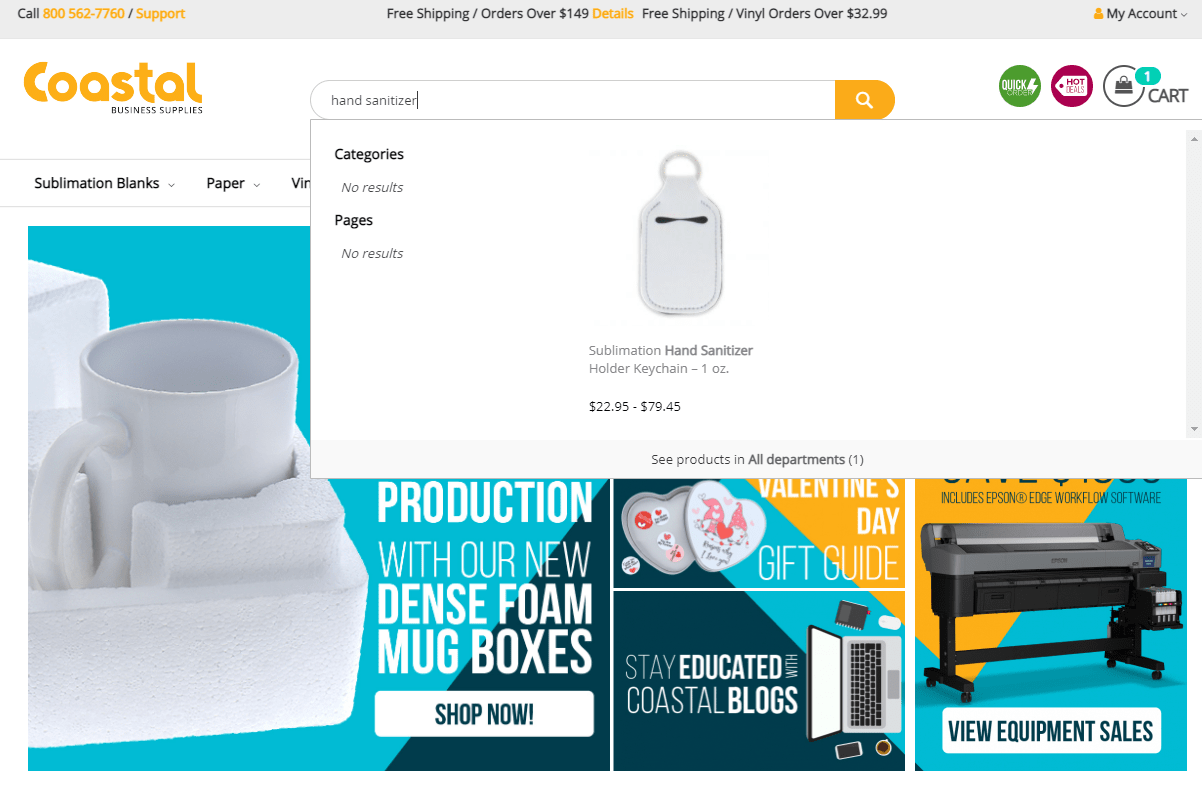
As stated, Coastal provides sublimation templates for all of the sublimation blanks we carry. Locating a template for your sublimation blank is easy! First, navigate to coastalbusiness.com. Next, search for the sublimation blank you purchased (or find it through our dropdown navigation). If you know your product’s SKU, you can also search that. For instance, searching “21108” will bring up our 11 oz. white ceramic coffee mugs.
Once you’ve located the product, click on it to go to the product page.
On the product page, scroll towards the bottom until see you see the product details/description.
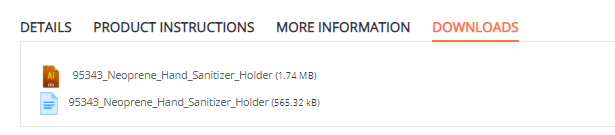
Next, click on the “Downloads” tab, and you should see both file types we offer (.EPS and .PDF). Click on the one you would like to download it. If you’re designing in Photoshop, choose .PDF. For Illustrator and CorelDRAW, choose .EPS.
How to Use Your Sublimation Template
Once you’ve downloaded your template, open it in your design program. For the purposes of this demonstration, we’ll be using Adobe Photoshop, but if you’re using Illustrator or CorelDRAW, the instructions will be similar. So don’t worry!
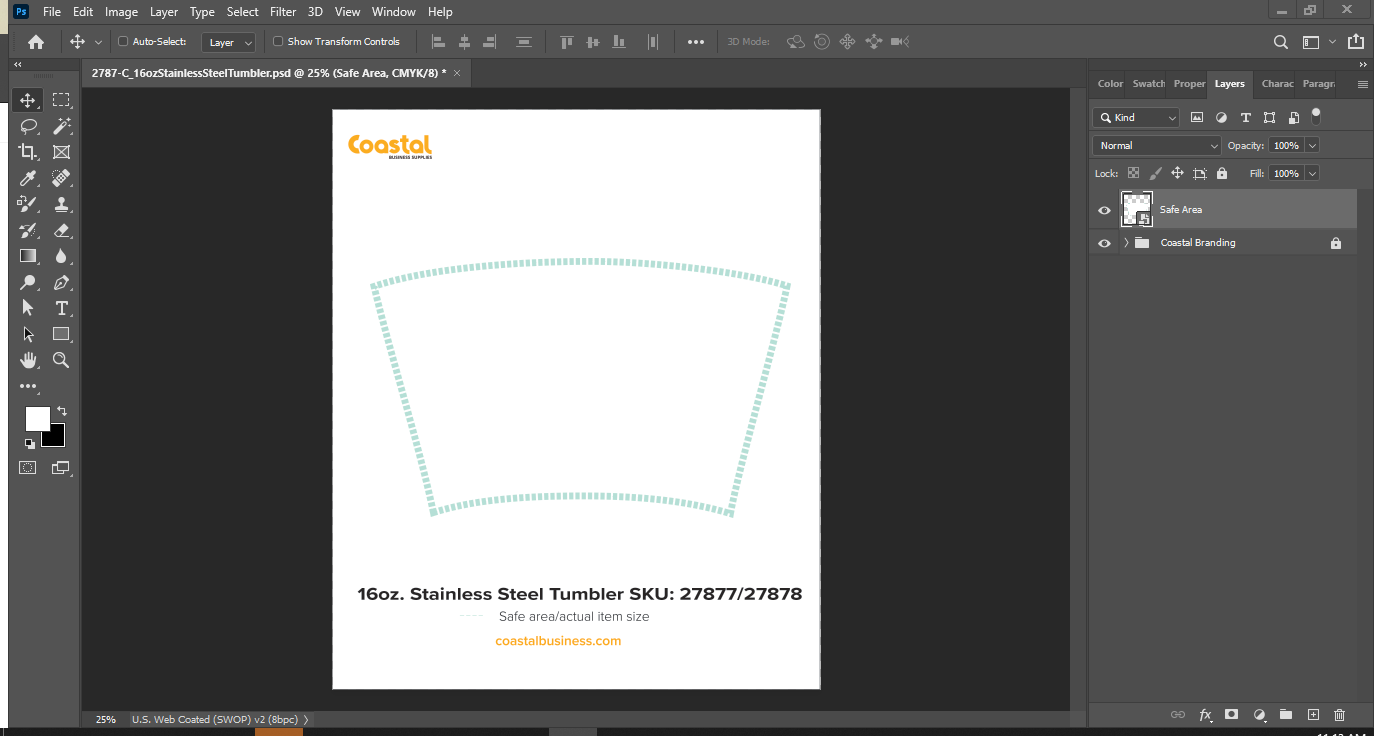
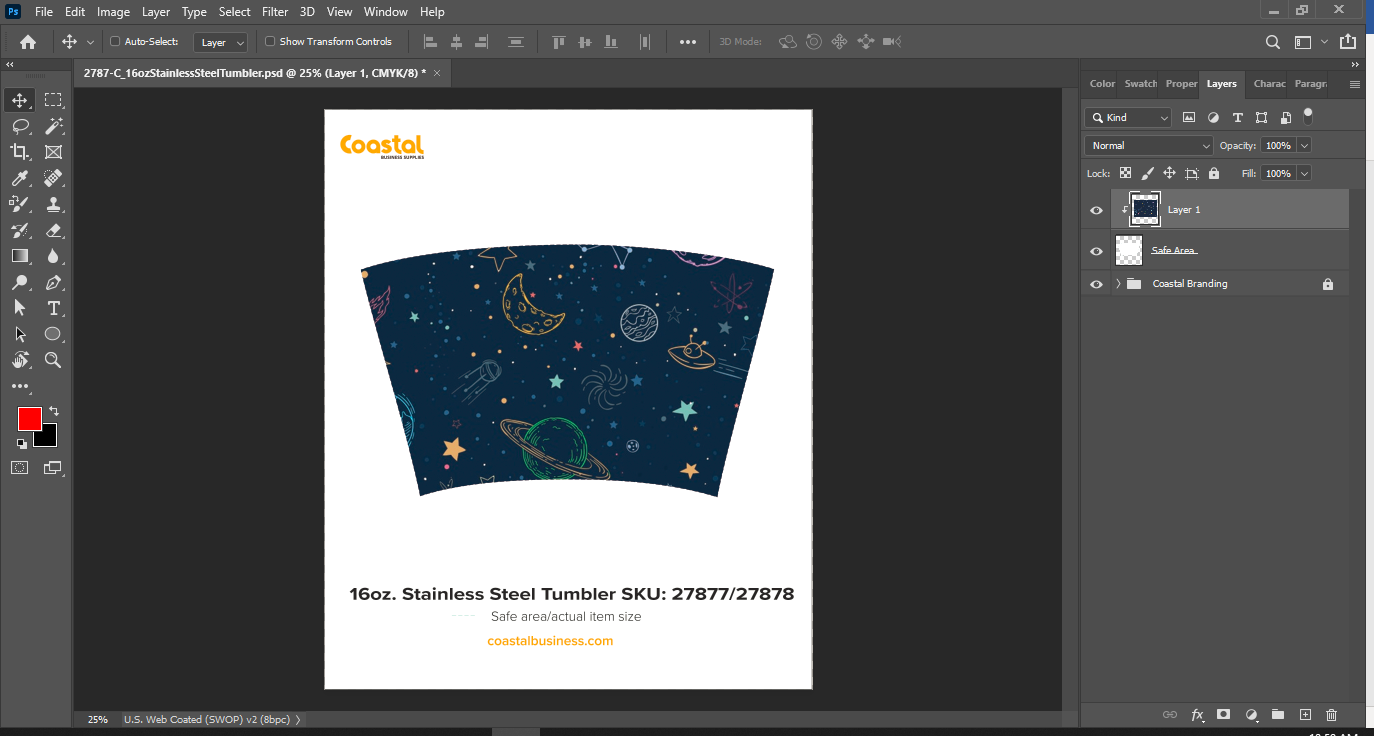
When you’ve got the template opened, you will notice three layers – safe area, bleed, and Coastal branding. The safe area is the actual item size. The bleed area is some extra printing space that we’ve added beyond the item’s size (between .25” and 1”), which gives you some wiggle room when you go to transfer.
Now, bring your designed image into your design program. (We should mention, you will probably want to have an image already prepared by the time you’re using this template). This could be a pattern that you downloaded online on websites like freepik.com or Adobe Stock, an SVG image you purchased, a photograph, etc.
Next, size your design appropriately within the template’s bleed area as shown in the video below. Next, create a clipping mask to clip your image into the bleed area (not the safe area). In Photoshop, this involves placing your design layer above the bleed layer, then right-clicking the design layer and pressing “create clipping mask.” After clipping your design into your bleed layer, you can hide the item size as well as the Coastal branding. And now, you should have one ready-to-go image that aligns perfectly with your blank!
How Does this Work for Curved Items?
When working with our templates for curved items such as latte mugs and certain other drinkware, you will notice there is not a bleed layer – only a safe area. This is normal! For these items, you will follow the same steps above except create a clipping mask to clip your mask onto the safe area instead.
All right, that about concludes this tutorial! We hope this walkthrough gave you more insight on how to work with Coastal’s sublimation templates. Additionally, you will find product-specific tutorial videos for many of our sublimation blanks on our YouTube channel. If you find yourself getting stuck or need additional help, don’t hesitate to reach out to our Customer Success Team at 800-562-7760 or by email at [email protected]. Happy Crafting!


0 Comments
Leave a Comment